
Starting A Layout Part 1
An article by Stephen McCallum aka fsm1000. This is an authorized repost of his article, which was originally posted on his website which he is now planning to close.
I am going to attempt to teach through example here so bear with me. This May take some time as I am not exactly rich and it takes time to buy all of this stuff.
Lets start at the beginning. Planning the layout itself.
First off if you have an idea of what you want to model you are one step ahead of many. If you haven't got a clue then go to the library, read a ton of books. Go to hobby shops (not just one) and ask a lot of questions. Sooner or later something will catch your eye and off we go.
Start by making a list of things you want on your layout. Put them into categories of 'must have', 'could have' and 'could live without'. This is also known as "given and druthers".
Next try to fit ALL of it in and then pare it down from there. Most of us would like a thousand square feet to put all that we want into a layout. But the truth of the matter is most of us only have a sheet or two of plywood to work with. So start at the top and work down. If your needs are small then your layout will not look too ungainly. However, if your needs are huge then win the lottery or cry a lot or redo your lists.
So remove the things you can live without for now. If the layout is now the right size for the place you are going to put it then add somethings from the list if you can. If it is still too big then remove stuff from the other list of 'could have'. You will now be down to the must haves. Most of us end up here.
So now you have what you need and hopefully a few other things as well. The next question is, "Will it all fit and how will I know for sure"?
For this we go to the pros and find that what they did was to make a model of their model. So we will follow in the footsteps of the greats (like John Allen) and do the same thing as well.
I myself model a narrow gauge railway. I also model in O scale. There are a few scales but the most common are HO scale, N scale and O scale.
Once you have the scale and an idea get out some paper and start doodling until you think you have something you might like.
Should you decide to follow along, you will gain skills in measuring, cutting gluing and others as well. All of these you can then apply to future things such as scenery, kit bashing, or my favorite, scratch building. I started this by first measuring the area I had and finding out what height I needed. This was a minimum of 32 inches. I also knew that the layout was going to be 6 feet by 4 feet. With this as a start I set about making a layout that was also movable on casters and later take downable for when we move.
Ok so first off I am going to use a 1/8 inch to the inch scale. So 1/16th would be 1/2 an inch.
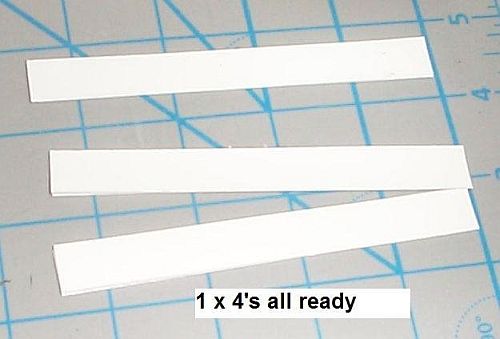
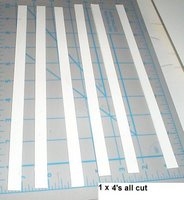
Next I got some bristol board. It is like heavy construction paper only shiny. I like working with this stuff. It cuts easily, glues well and holds its shape well too I found. I first cut out some 1 x 4's that were 32 inches long.
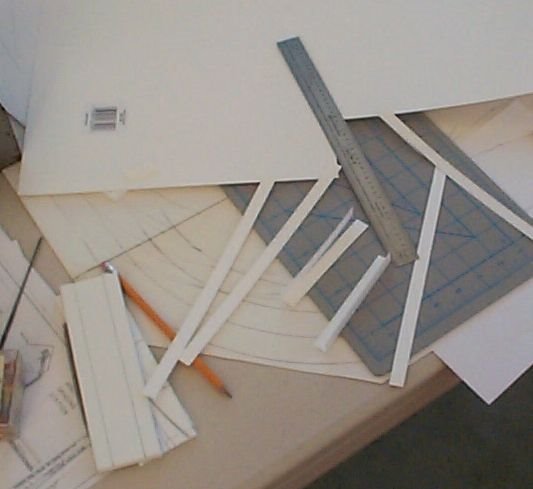

A note about wood. Over here when you buy a 1 x 4 it is NOT 1 x 4. It is really 3/4 by 3 1/2 inches. I am sure it is the same where you are as well. The only exception to this is called 'dimension wood'. But this is very expensive.
So when I cut these out I made them 3 1/2 inches wide.
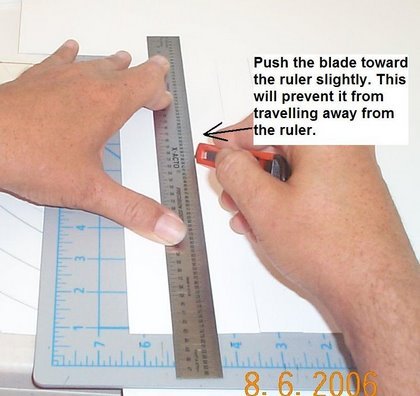
Make sure you apply an even pressure when you are cutting and also while holding down the ruler. DO NOT PRESS TOO HARD. You want to be firm though. One thing many beginners do is to press down way to hard when they are cutting. It is much better to make a few light cuts then it is to make one or two heavy cuts. Mistakes will always happen when you cut too hard. Also I find that if I push the blade lightly towards the steel ruler (hence why I don't use plastic or wood rulers for cutting) so as to ensure I don't wander from the straight edge. practice this now so that when you work on something with a grain, like wood, later you will have some experience under your belt.
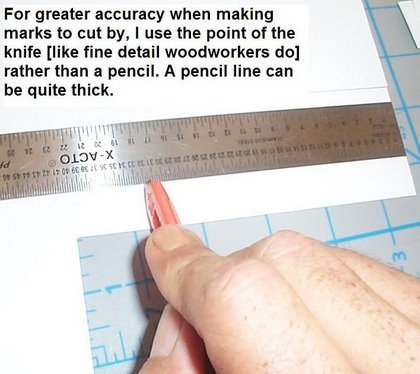
If you ever watch a fine furniture maker you will not see them use a pencil too often. The reason for this is that no matter how sharp the pencil, for some marks it is just too thick. They use instead a sharp steel marker. This ensures an accurate marking. You can do this too by using your knife blade to make your marking, but not too deep or big though. However big enough to see without squinting. You then line up the cut marks and cut. And presto we have lumber.
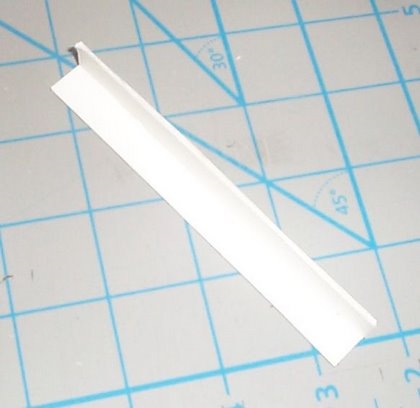
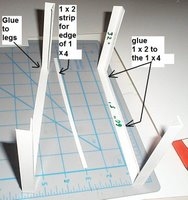
I glue two pieces together and let them dry for about five minutes. You don't need a lot of glue. But I find with this material I do need to hold and push it down a lot until it catches. After a minute it holds.
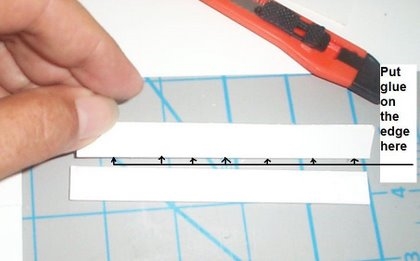
Ok so now you need to apply a thin (this is good practice) bead of glue along one edge of one 'board'. This is going to be tiny so patience is needed and a steady hand.
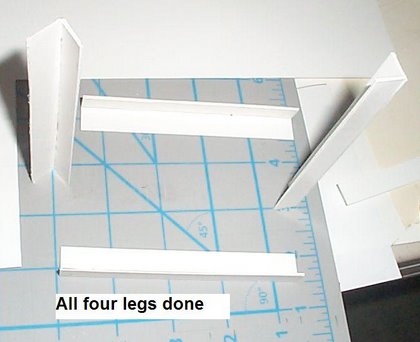
Repeat and you now have four legs. One note. I wanted the 'front' legs in such a way as not to show an edge on the forward part. So make sure they are glued on a left and right version. Or if you make a mistake, just turn it upside down. :) That works too.
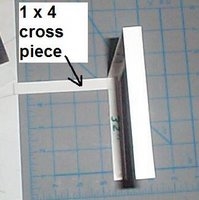
Ok so now we need some supports and crosspieces. Once again make some boards by cutting out some 1 x 4's. In this case they are 3 at 5 feet long and 4 at 3 feet long. You are also going to need some 1 x 2's. Just a note. A 1 x 4 is actually 3/4 by 3 1/2. And a 1 x 2 is 3/4 by 1 1/2. So make them two thicknesses of paper by 3 1/2 scale inches instead of 4, and the other 1 1/2 scale inches instead of 2. Like I said, this is good practice.
Now glue the pieces together as per the pictures. [Later on you will be making 1 x 6's, in actuality they are 3/4 by 5 1/2].
And there you have it. A base.
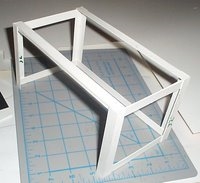
Double check as you go along that it is all square at the corners.
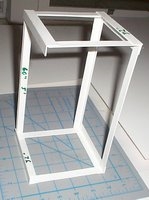
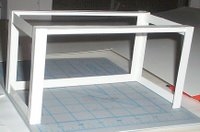
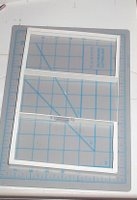
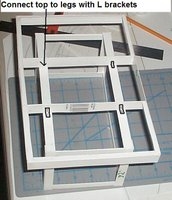
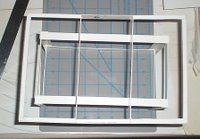
Ok so now we have the base. We now need to make a box frame for the layout itself to sit on. Now some would use something called an "L-girder" style. And maybe one day I will get into that. But for this layout I want it to be a box style.
Ok for this we need 1 x 6's. If you remember last time I said that lumber here is not what it seems. A 1 x 6 is actually 3/4 by 5 1/2. So we need to cut it 5 1/2 scale inches wide.
We are using the 1/8 inch equals an inch scale for this project. To be honest you can use whatever scale you want. I choose this because I like it for this project size. Also the thickness of the paper is almost a scale 3/4 inch when doubled.
Ok for this we will need two pieces 6 feet long, 2 pieces 4 feet long and 2 pieces four feet and 1 inch long. The extra inch is needed because I am not making scale 'quarter round' for this. And they will fit on the ends.
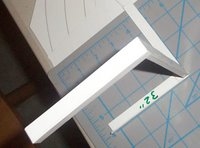
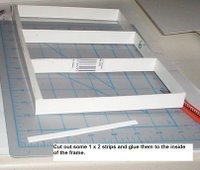
You will also need some 1 x 2. Remember that 1 x 2 is actually 3/4 by 1 1/2. Lots and lots and lots and lots of practice eh? You must be happy. :) Remember to take your time. Slow and steady is better than fast and sloppy.
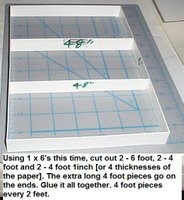
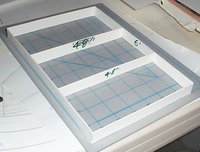
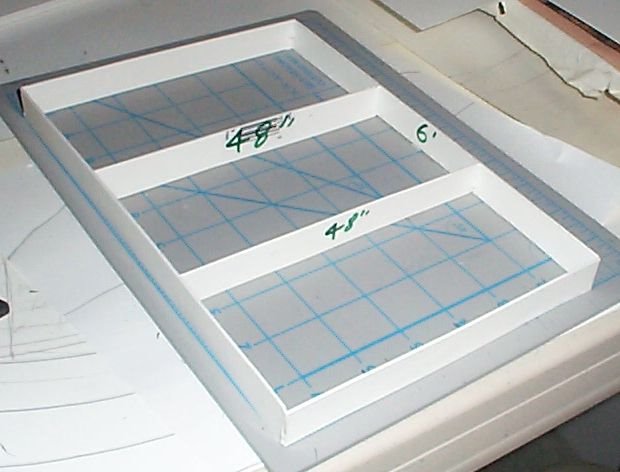
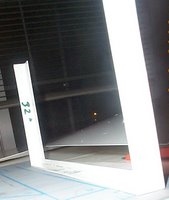
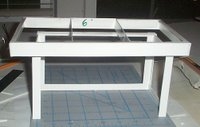
I often mark on a piece what its length and or width is. You can see the "48" on some of them.
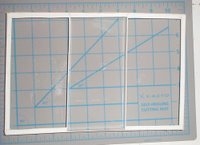
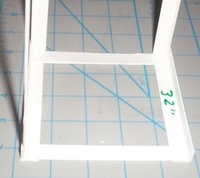
You will notice in the above picture that the middle brace is missing from the boxframe. The reason for this is that I am still not sure if I am going to put in a lower section. You see, it is for reasons such as this that I make a model of my model. Better to mess up a few cents of paper now then to mess up fifty bucks worth of wood later.
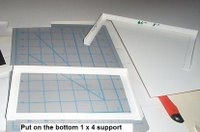
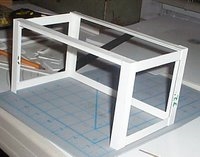
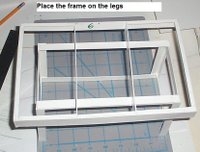
Ok now we can put it all together.
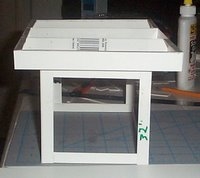

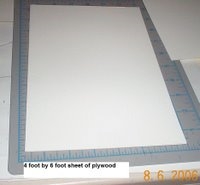
Now we need some plywood sheeting. I cut out a piece 4 feet by 6 feet.
Remember to make two of them and glue them lightly together.
You will notice that the plywood is a bit smaller that the box frame. In real life it would fit inside of it. If yours doesn't don't worry too much about it. So long as it is very close for now it will be fine. We have more to do yet.
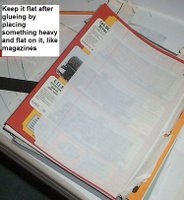
Use something flat to hold it flat. I used magazines.
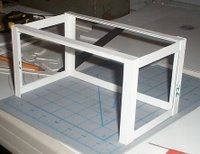
At this point it is probably looking pretty bare. Take down the top and set it aside for now. Just like the real one, this one comes apart. Except you don't need screws. :)
We need to take our doodle of the layout we made before and now find out if it will work or even look good. Sometimes when we see it in 3d it looks totally different than what we imagined. Yet another reason to model your model.
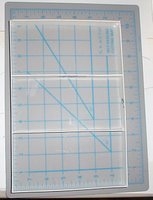
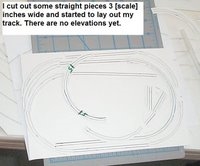
First things first, put in a new blade (or snip it like mine) because the one you are using is pretty dull by now. Carefully using a compass, draw out a radius of 17, 18, 19 and 20 inches using the same center. This will give you a track radius of 18 inches. If you want a different radius then make it that size. Remember to add one inch on the inner radius and 2 for the outer. Example: You want a 22 inch radius so make it 21, 22, 23, 24.
This will give you the 3 inches needed by On30 cars and locos on curves. It will also show you where the track is.
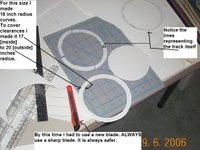
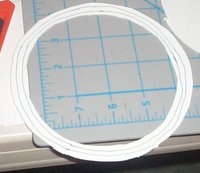
Ok now make some 3 scale inch wide straight pieces. Make sure you put in the track here too. Make the track rails an inch apart. It works.
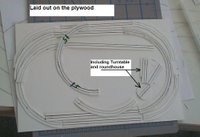
After it is all cut out. (Be VERY careful and go slowly and deliberately. This is tricky and you can cut yourself easily on the curves). You can now assemble your layout. DO not glue it yet, just lay it out.
I also built a roundhouse and turntable for mine.

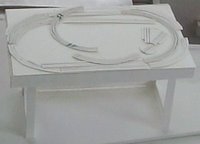
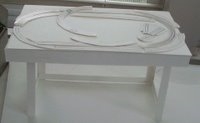
Ok that's it for now. It will keep you busy until I can get some wood (I hope) and we start in this for real. Now when you are done. Make another, and another. Seriously. It will help.
The bristol board only costs a buck, and the Elmer's glue is 2 dollars a small bottle. The knives I use I get at the dollar store, 4 for a buck. I used one sheet of paper for this. So it is not expensive, but the practice is priceless. So make a few until you feel confident in this. Truly it will help a lot.
©2009/2020, Stephen McCallum, https://www.modelrailroadtips.com