- Details
- Written by Steve B.
- Category: Freight Projects
- Hits: 2630
Coal Car Loads from Scratch
A simple method to make loads of cheap coal loads for your coal cars.
Rather than buy imitation coal loads for my Walthers Bethgons, I made my own using a very simple method anyone can do.
The only tools you will require are:
1. a sharp knife to cut foam
2. a rasp or coarse sand paper instead
3. a spray bottle with water / rubbing alcohol 90/10 mix
4. a piece of 1" thick blue foam board, the quantity depends on how many loads you require you will require
5. PVA glue, both full strength and some diluted with water about 75/25 mix
6. a bag of fine coal or imitation coal such as the grit used in sand blasting cabinets
- Details
- Written by Frank Wells
- Category: Freight Projects
- Hits: 3295
Don’t Write it Off Just Yet: Salvaging Warped Kits
By Frank Wells
Introduction:
Personally, I enjoy modeling projects that require going the extra mile to create something unique. Whether it be one of a kind locomotive or a freight car not commonly found on the market, I’m all for doing it myself, rather than wait on a major manufacturer to produce it. This is what drove to my create my latest creation, the BNSF Circle Bi-level Autorack. While this particular car has been done by Walthers previously, it was done quite a few years ago and few exist commonly on the market today. Seeing as I was set to create multiples of this autorack, I also saw it as an opportunity to accrue funds for future projects, which quickly progressed the project start. In my case, I ended up using a new-old stock of Walthers Autorack kits as the base, Arrowhead Wheels, Kadee Couplers, and custom decals from Switchline Decals. I chose the Walthers kits because they were readily available from a friend of mine, who had nine he was looking to sell. Eight of those nine would be completely fine, the car bodies free of warp. I did not discover my “problem” car until I was ready to paint the bodies at a friend’s house, finally breaking the sealer wrap to find the side of the autorack not facing outward had severely warped on one end. I worried that the severity of the warp would force me to write it off, but I was hit by an idea. I recalled I had a heat gun at home. So, after deciding to paint it regardless of the warp, I would take it home and give the heat gun a try.
Read more: Don’t Write it Off Just Yet: Salvaging Warped Kits
- Details
- Written by Dave Allen
- Category: Freight Projects
- Hits: 2690
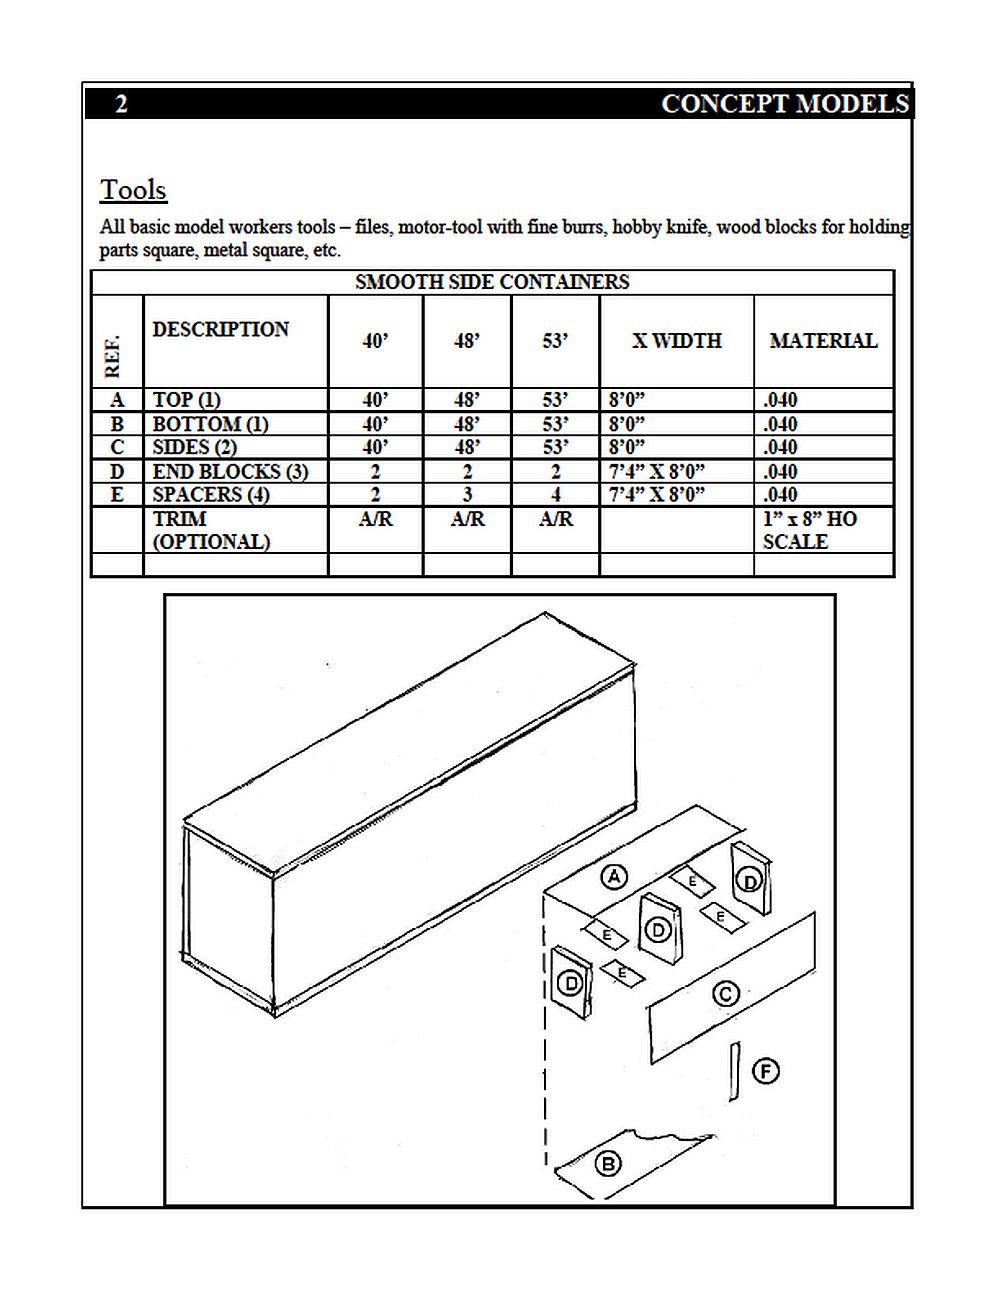
Smooth Side Containers
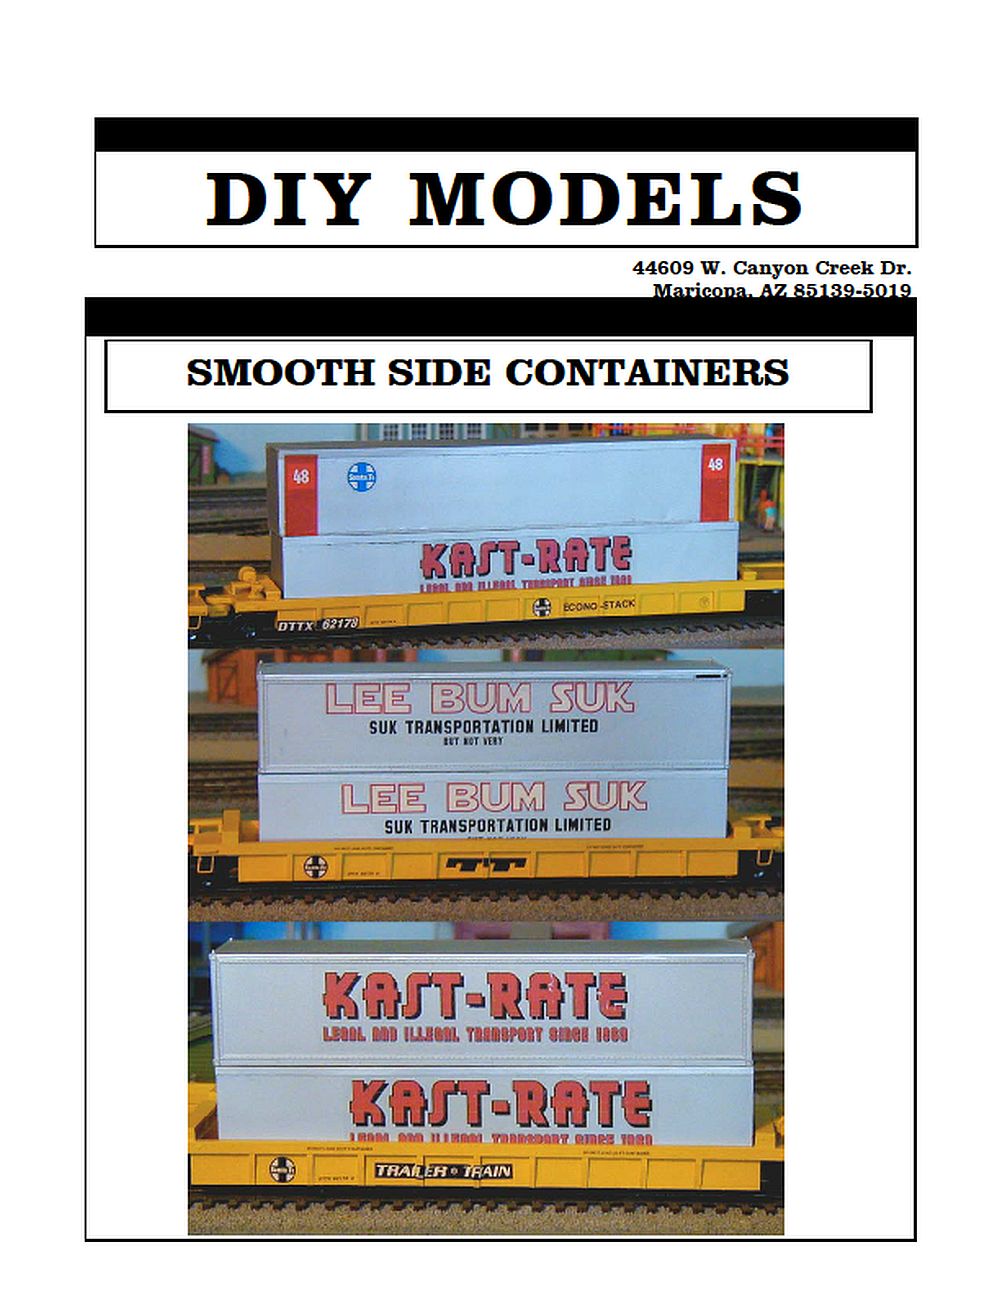
© 2010, 2019, Dave Allen, https://www.modelrailroadtips.com
- Details
- Written by Josh Baakko
- Category: Freight Projects
- Hits: 3012
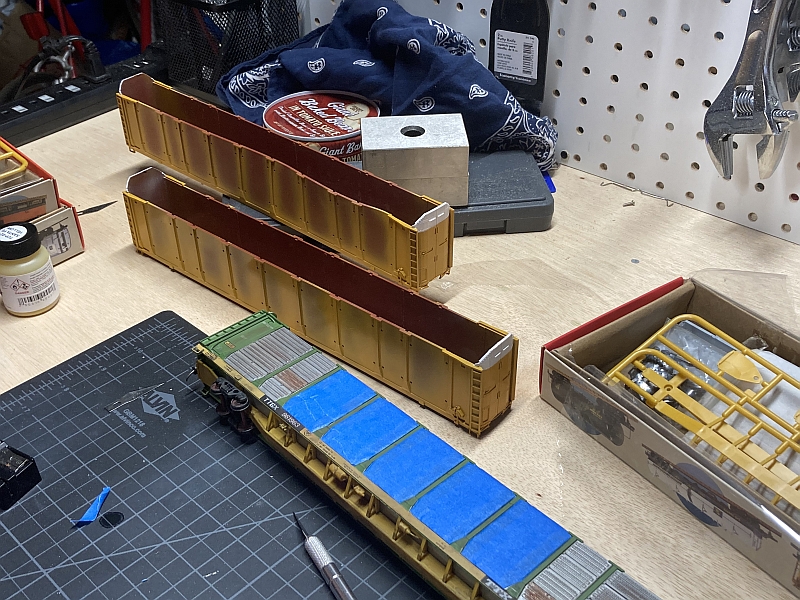
Bulgy Gondola Sides
Excerpt from the Model Railroad Tips newsletter, Volume 1 Issues 2 through 4.
Modeling bulgy sides on gondolas (and other cars) has always presented a challenge. We're faced with
a decision, heating the sides of the car, or building it up with some modeling medium.
Recently I took on this challenge on an Eastern Car works PRR G26 gondola kit. I started with an
undecorated gondola kit. I'd recommend this as the technique I'm about to show requires painting over.
The final gondola will be painted in a semi-freelance Conrail paint. A small number of the G26 series
made it into Conrail paint, however I've never found a photo online (if you have one, please reply!).
I began by assembling the car, though you can do the work on the flat car sides.
- Details
- Written by David Allen
- Category: Freight Projects
- Hits: 2815
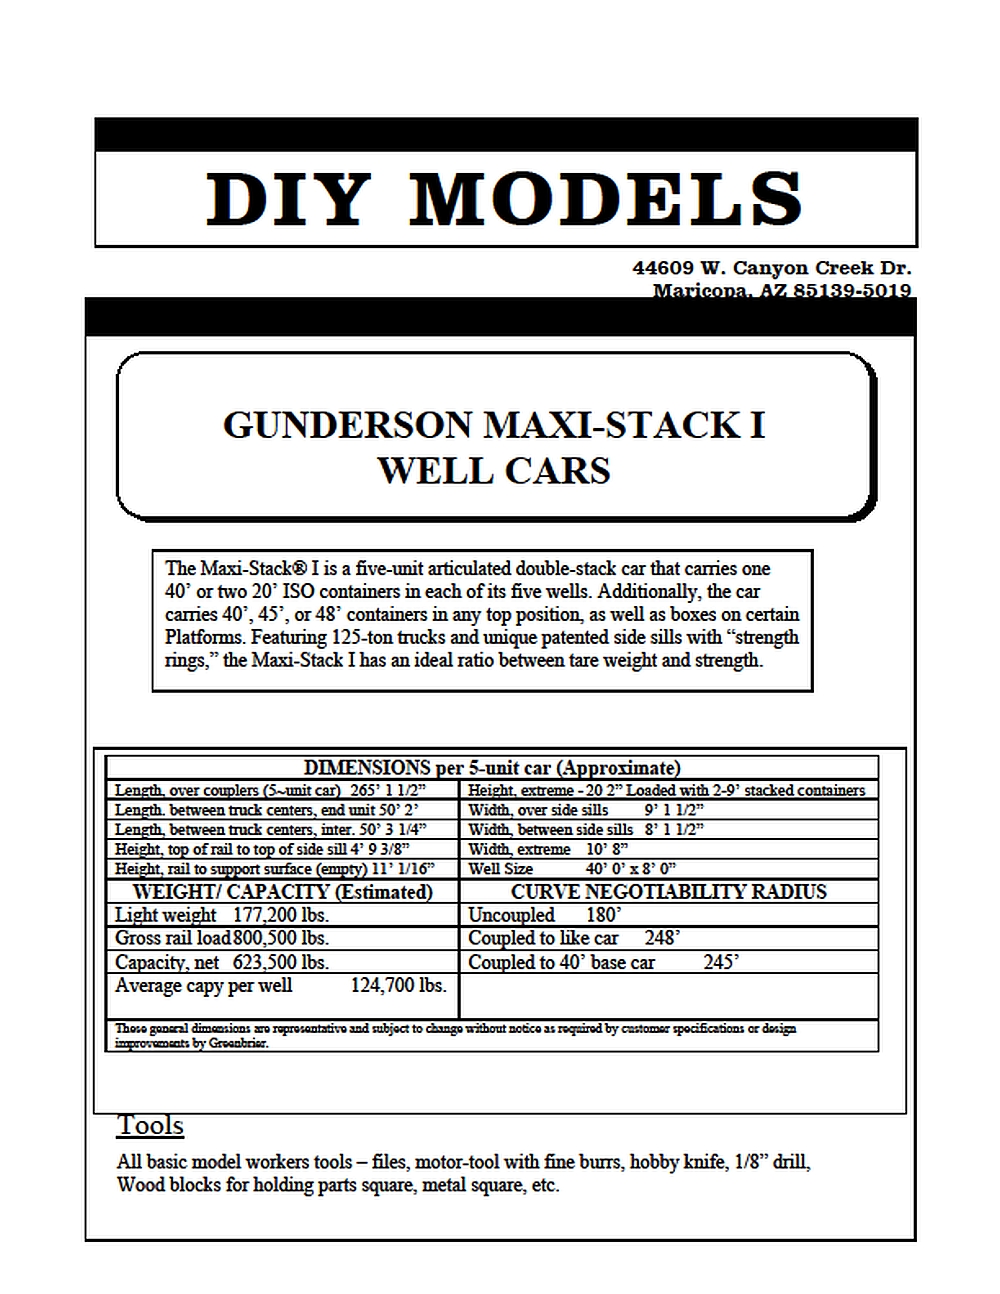
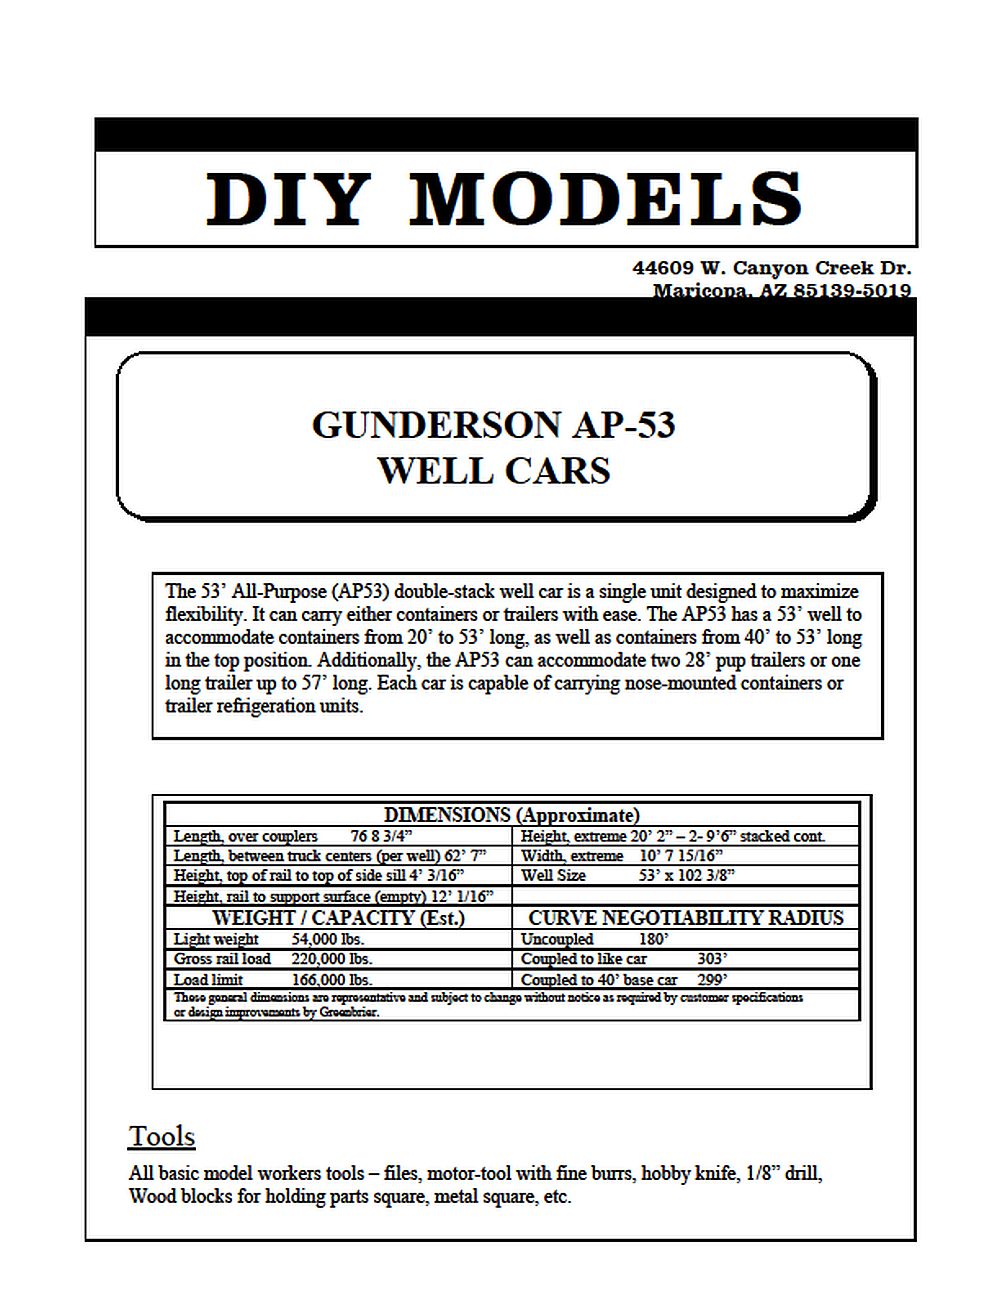
Maxi-Stack I Well Cars Scratchbuild
- Details
- Written by Josh Baakko
- Category: Freight Projects
- Hits: 3105
Modeling a Turtle Creek Central Boxcar
Drawing from Model Railroader's famous 4'x8' layout, the Turtle Creek Central
Microscale decal sheet, Roundhouse double plug door 50' boxcar, and Model Master SAC Bomber Green.

- Details
- Written by Josh Baakko
- Category: Freight Projects
- Hits: 3487
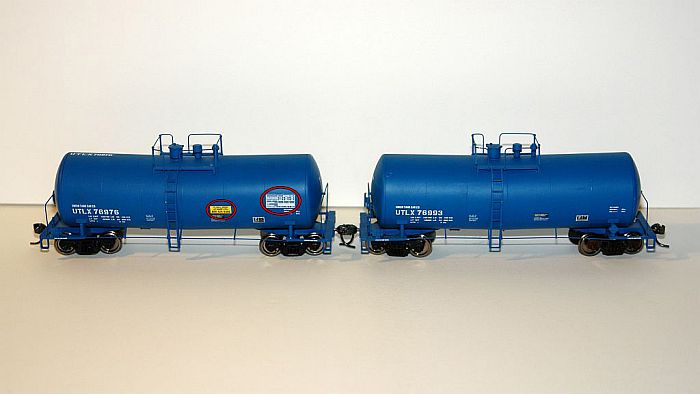
Tank Car Data Upgrade
Published in the December 2011 email newsletter, with updated material in 2012.
Recently I was working on a few Walthers 16,000 Gallon Funnel Flow tank cars, decorated for Procor-Sulphur, blue with UTLX reporting marks. These tanks cars are numbered randomly in the UTLX roster. After a considerable amount of searching, I came across a few, though not the same numbers Walthers used on the 3 cars I have.
Prototypes:
UTLX 66373: http://www.railcarphotos.com/PhotoDetails.php?PhotoID=23413
UTLX 71651: http://www.railcarphotos.com/PhotoDetails.php?PhotoID=6926
I noticed that both cars had the emergency call placards, and the more recent photo of #66373 showed the new tank car testing placard. Though very hard to see, but present was the appearance of reporting marks on the top of the car, required on tank cars now.
I set to work, updating the data on my cars. To begin, add the emergency placard, from Microscale set 87-1236. Look closely, as there are placards in French on the sheet as well, I used the English, 800 number version.
I then added the top reporting marks, using Microscale 87-1320, stencil lettering. The last decals, the testing data placards, come from Highball Graphics, #F-163. I used the white version, but the sheet also includes black, which I used on an Atlas ACFX Kaolin tank car I'm working on at the same time.
Page 2 of 2