Building an HO Scale Asplundh Weed Train Sprayer Control Car
Semi-scratch built weed train sprayer control car
Building an Asplundh Weed Train Sprayer Control Car
Part 1- Collecting needed parts
Part 2- Making the basic shell
Part 3- Scratch built details
Part 4- Assembly
Part 5- Last details
Part 6- Extra details
Part 7- Decals
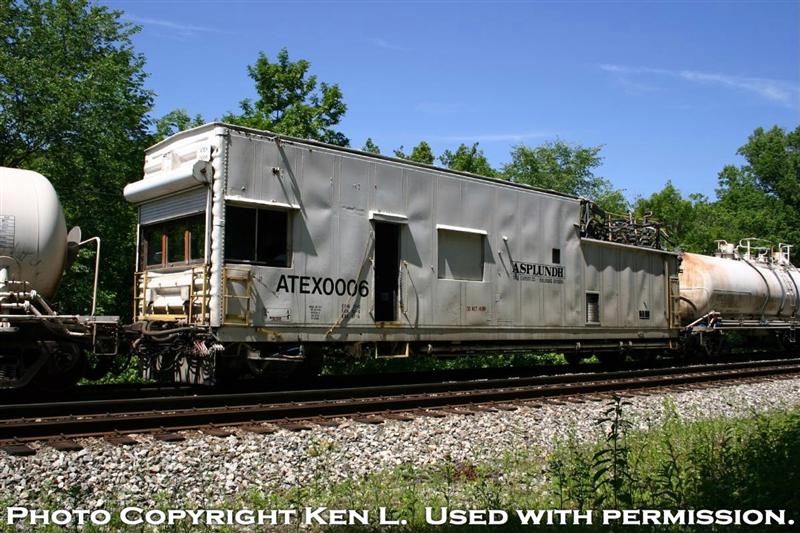
In this article I will show you how I assembled an Asplundh weed train sprayer/control car. I began with choosing a boxcar kit that would be suitable, I went with a Life-Like Proto 2000, 50' single door box car, stock #21899, Undecorated. I found a seller on eBay with a dozen, and purchased 2 from him. Buy two of whatever car you decide to use, as you'll be cutting one up to fill the hole where the door was located.
Part 1 Collecting the needed items.
As I stated in the overview, I used two P2K 50' single door boxcars. As I had no real idea of the exact length of car 50' seemed like it was right, after all you can't go wrong with a 50' car. The P2K boxcars I bought are riveted side, the car I modeled looks more like it has welded sides, but oh well. They come with a VERY well detailed underframe. The roofwalk, stock trucks & wheels, the doors, and stock brake wheel are all discarded from this build.
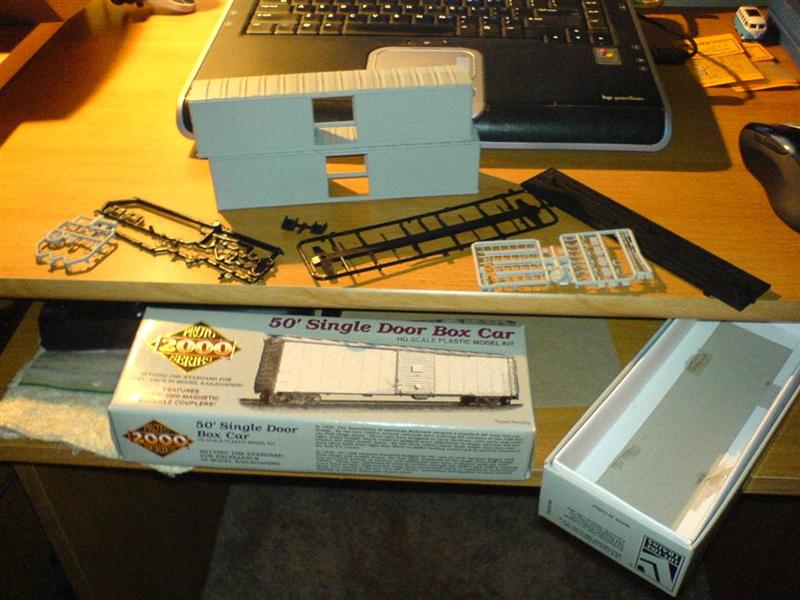
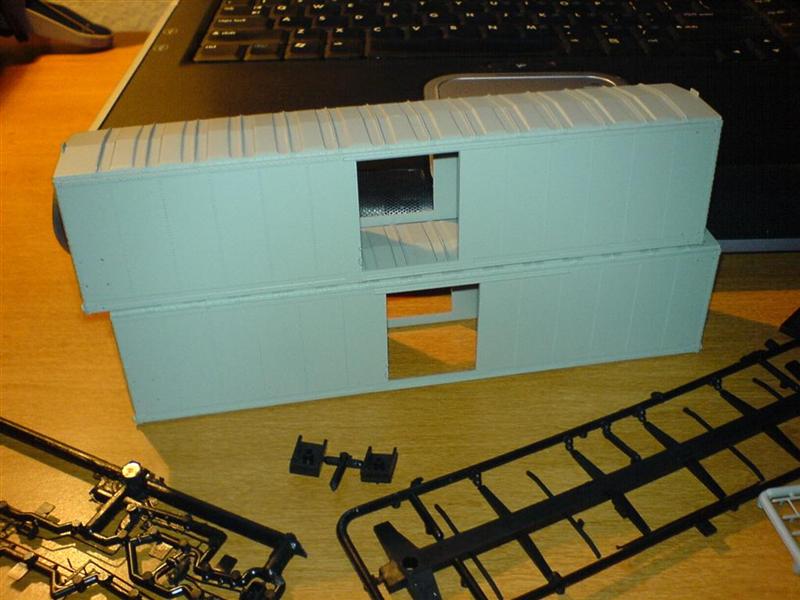
I used left over parts on my project, as much as possible. The brake wheel was left over from another car, the trucks discarded from an Accurail 89' flat. The wheels are brand new P2K 33" flat backs, the trucks being 100T trucks. The piping is scrap from a Walthers oil refinery pipe kit. Below is a list of items you'll need, not including the boxcars.
- 100T trucks with 33" smooth back wheels.
- Cushion Pockets, Walthers makes a good plastic 8 pack.
- Brake wheel, side mounted
- Couplers (if you don't use the ones that come with the boxcars)
- Scale 2x2 strip styrene
- Scale 2x4 strip styrene
- Scale 4x4 strip styrene
- .015" thick sheet styrene
- .040" rod styrene
- .080" rod styrene
- .100" rod styrene
- Scrap styrene pieces (for interior framing)
- Metal grill mesh (I used chunks from a Dash8 grill set) OR Plastic grills
- Scrap tube of some sort (for compressor on roof)
- Cannon Cab kit (can be scrap, you need the windows & door handles)
- Locomotive air tank (15" scale will work)
- .015" Brass wire
- 25lbs test fishing line
- CA adhesive
- Plasitic adhesive
- Paints
Part 2 Making the basic shell.
So now you start the shell. Saw out the old door frame, about half way between the rivets for the panel, with out cutting into the roof, we're going to keep it as one complete roof, so were don't make the car to long, or to short. Carefully, with a new #11 blade or a #15 (straight) cut the door guides off the shell.
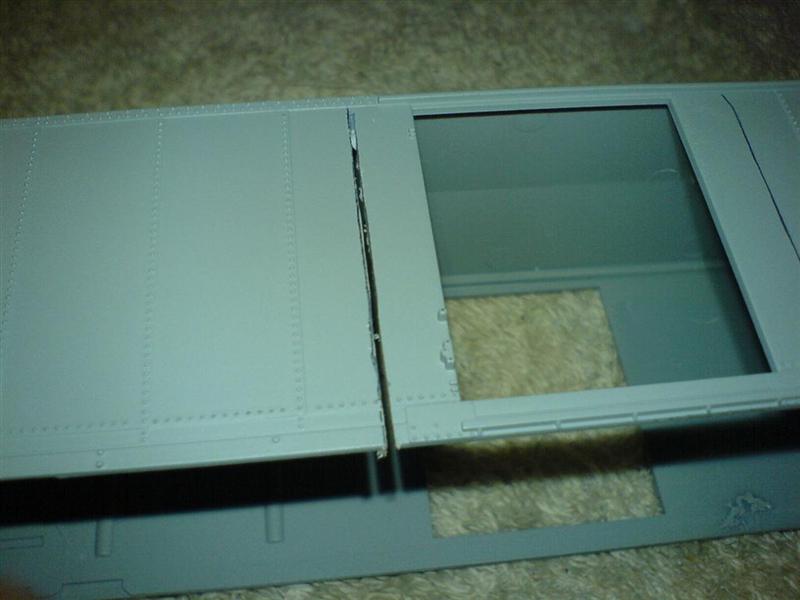
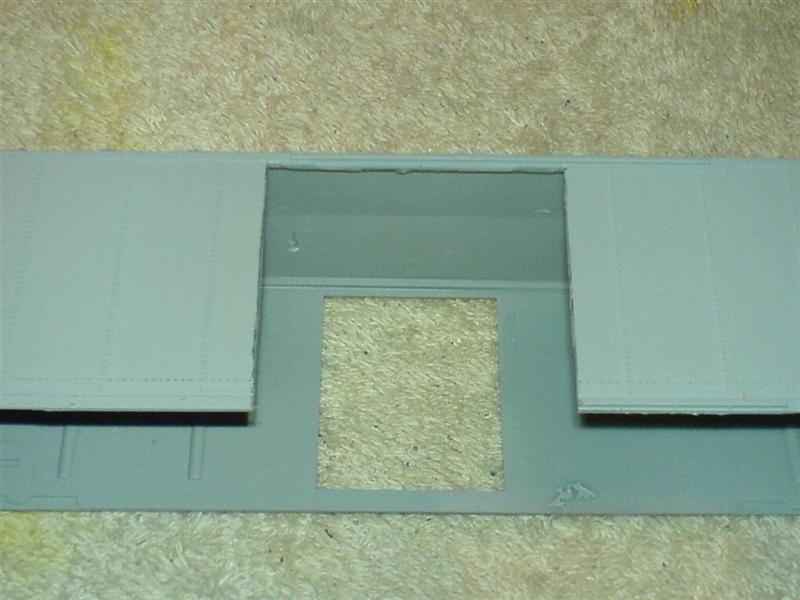
Now pick up the spare shell, and start cutting out a section of the body, again cutting halfway between the rivets (thus allowing you to have filler room). I sawed all the way over the roof, then carefully sawed the roof off afterwards. Using some scrap styrene to cover the gap, cement to the inside of the car, leaving overlap room into the whole from the old door. Make sure the scrap styrene is not to long, as to interfere with the car floor. Now cement the new blank panel in, using the scraps previously installed to keep it flat in place. Once dry, fill an gaps with filler putty & sand smooth [Ed. visit Using Bondo Auto Body Filler for a technique on filling gaps and holes]. At the same time fill all the pre-drilled holes on the car.
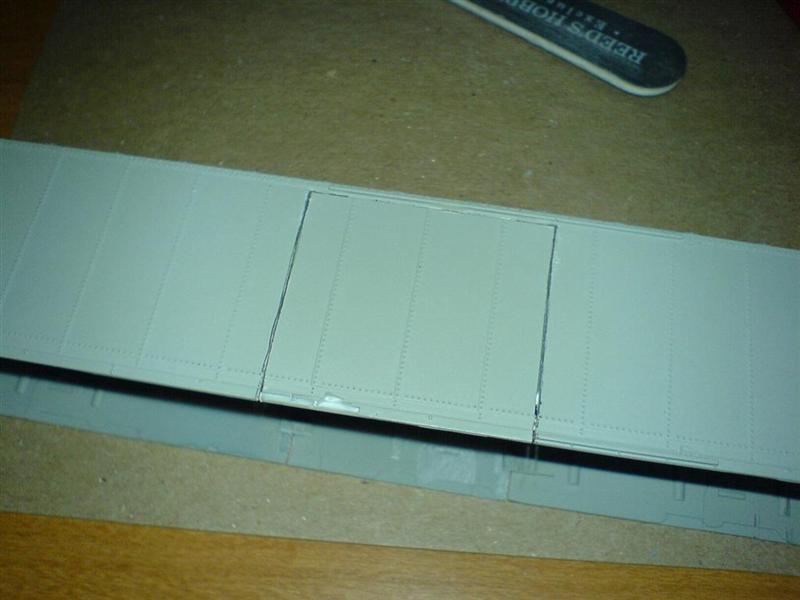
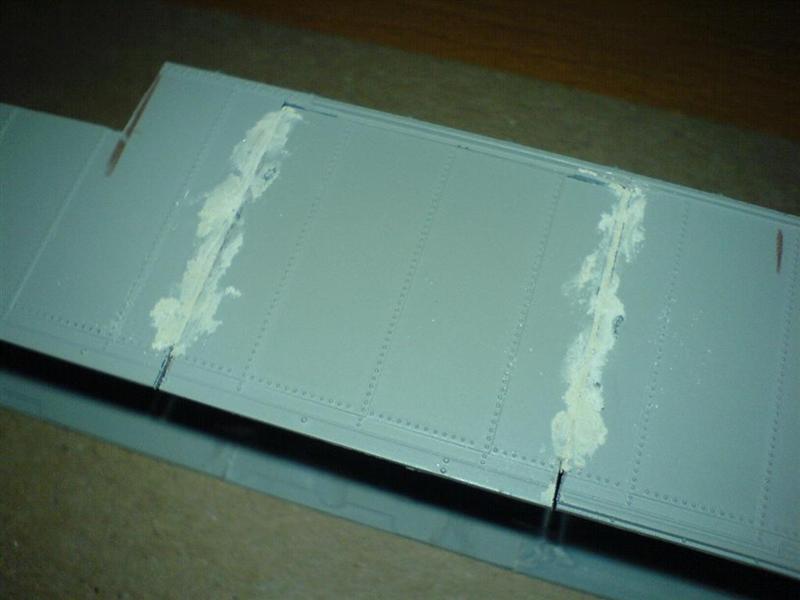
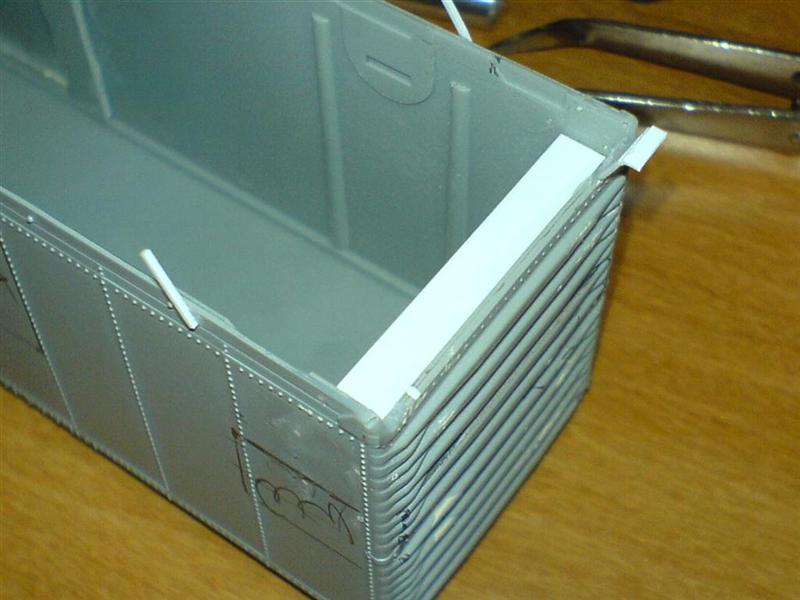
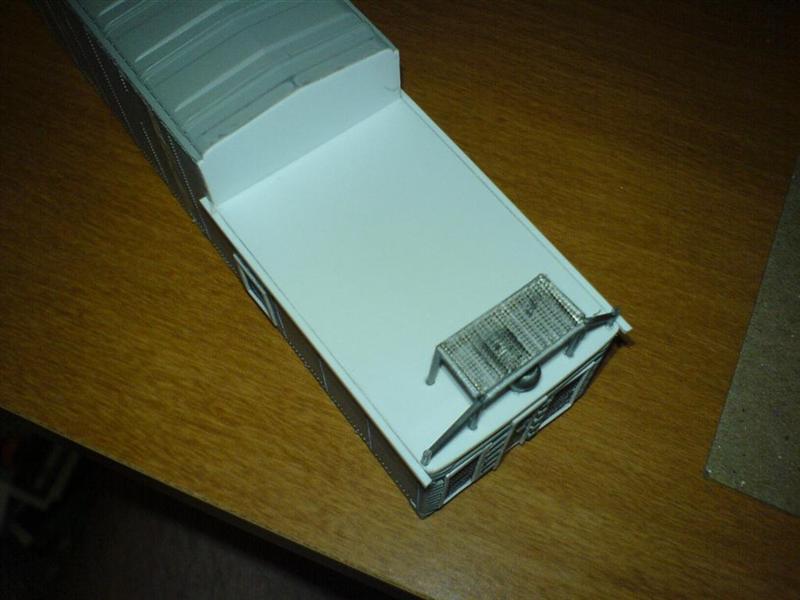
Mark out & cut the "rear deck". This deck is on the "B", or brake, end of the car. If using the P2K boxcars make sure you have this correct, as the floor only fits on one way without some major modification (I learned this the hard way). As you can see by the photographs, I added some scrap styrene (.060" x .188" strips) to frame out the underside of the deck. This is most important to the middle of the car, to support the deck.
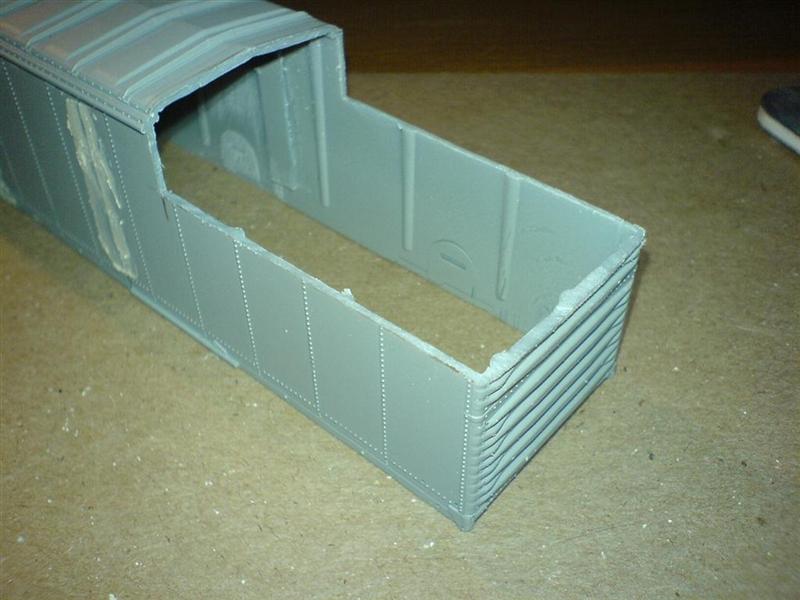
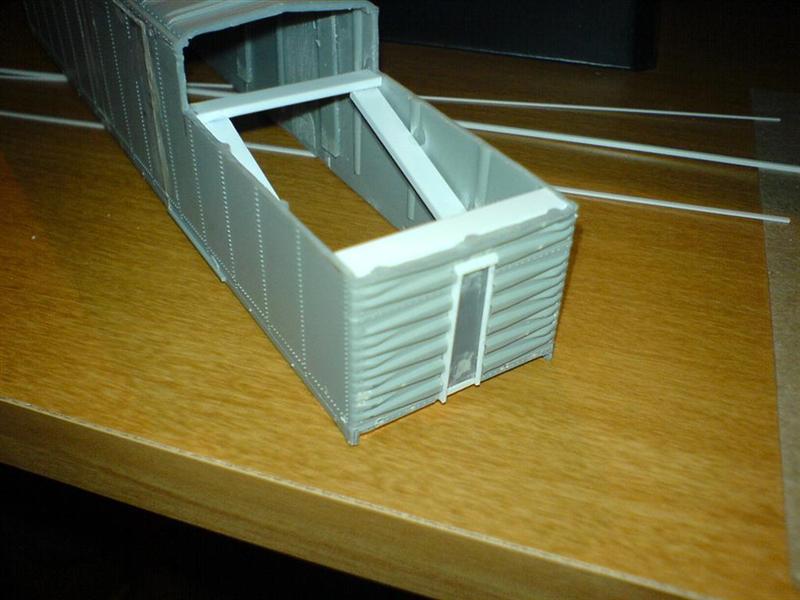
Once done, mark & cut the rear deck. I cut mine just a hair too large. Cement in place, and let dry. Once dry trim the deck's edges smooth, including the end (I.E. follow the contour of the boxcar end).
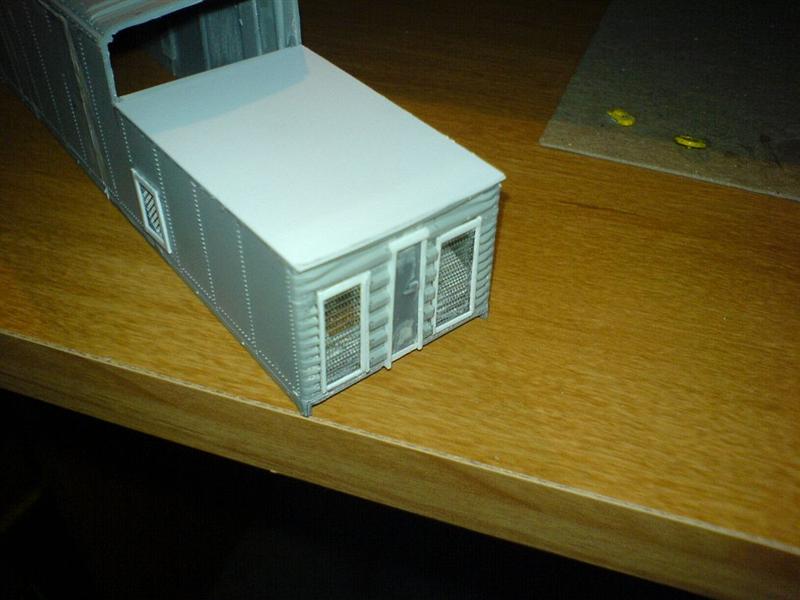
Mark & cut the end plate, and cement into place. Once dry, trim this piece to the roof contour.
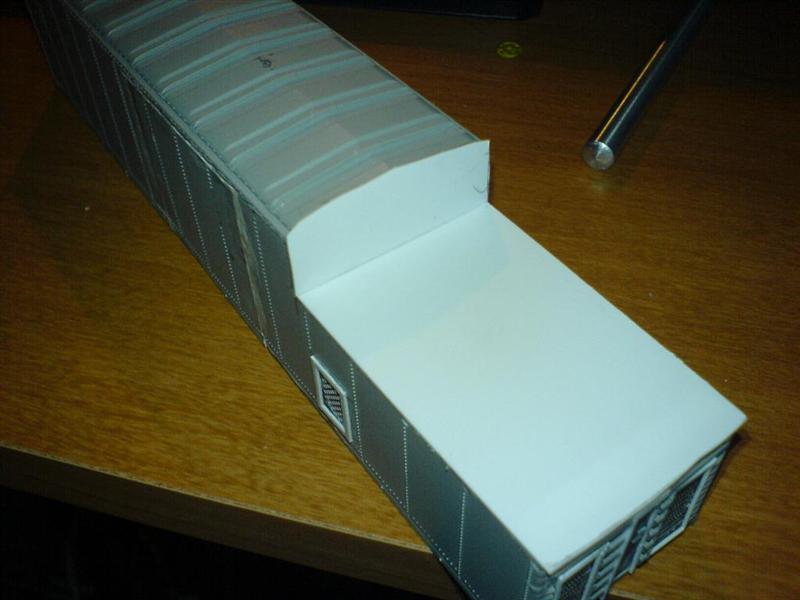
Add Scale 4x4 strips to the side of the deck, slightly overhanging the rear, and also the middle of the car.
Part 3 Scratch built parts.
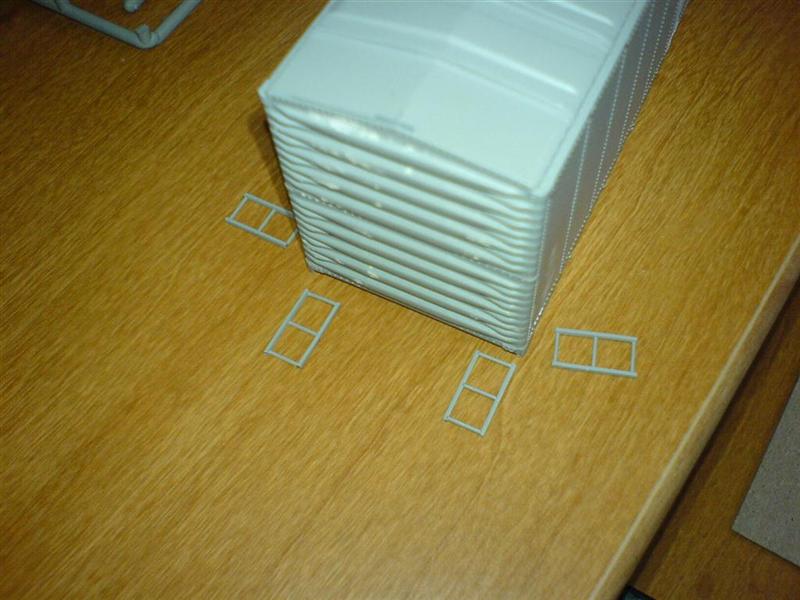
Now for the fun stuff. Start with the windows. You'll be making two "open" windows & two "closed". I took the windows out of the Cannon Cab set, and cemented them together. I then framed them with scale 2x4's. This is your "open" window. Use a completed window for a pattern, and cut two plain sheets of styrene to match. Then make a frame on those with scale 2x2's (glued to the surface). You should now have 4 windows.
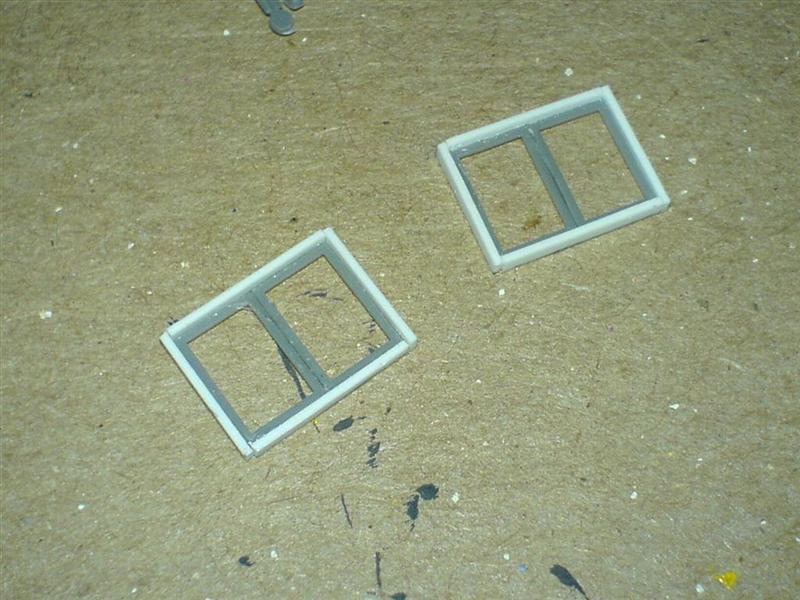
Now to make 3 doors. Start with the two side doors. Cut the doors from plain sheet styrene. For a simple measurement, tip a window sideways and use its narrow side to mark the width of your door. the height will match the rear doors height, so measure the door that way. The narrow rear door will be slightly narrower then the side doors, use the height of the boxcar end as a guide, leaving about a scale 5" from the top of the door to the rear deck. These are "done" for now.
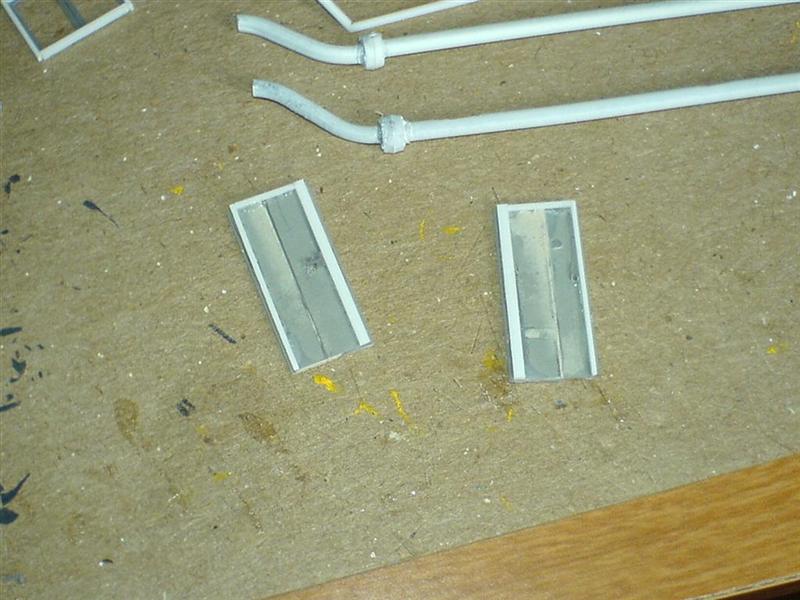
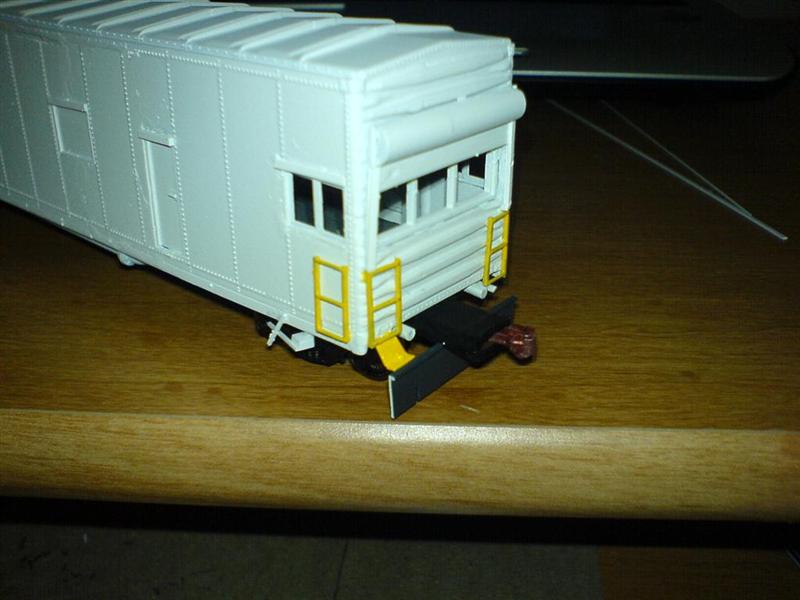
The front window is more complex. They measured out to be about square. Just use the height of the Cannon Cab windows (with out the frame), and the width of the car as a guide. I used a scrap Locomotive air tank for the roller above the front window. Sand the back smooth, so its about 2/3s of the original thickness. I framed it with a "L" door guide made from 2x2's & 2x4's. The roller door can then be made with 2x4 strips, or like I did, with a single strip cut from the styrene sheet. Make sure the door guides will be long enough to make it to the bottom of the window (make them longer, then cut to fit later). The ladders we cut from the ladders of the boxcar kits. The four front ladders have 3 rungs each. The rear side ladders have 4 rungs, with a very small extension of the sides on the top. The rear two also have 4, but the sides are about half way to where the 5th rung would have been.
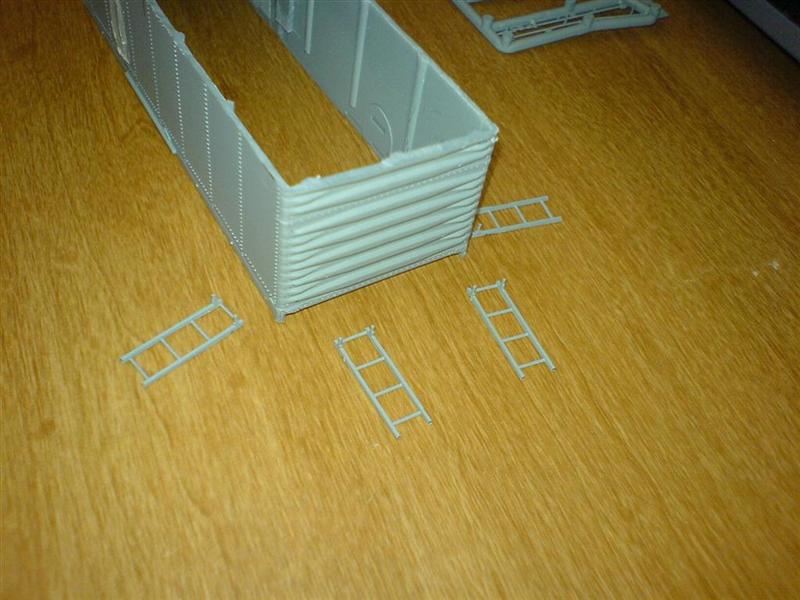
The coupler cut levers are mounted to small plates angling down from the boxcar, make these with scraps of the sheet styrene.
The front of the car has a rock flap. On the prototype this is the same rubber mat as a car's mud flap, I modeled it with sheet styrene, painted tarnished black. The rear, non-brake side (left if looking from the "A" end of the car) has a sliding door. This door was simple, I just made another "L" guide, and cemented a door made of sheet styrene in between it. This part can be glued directly to the outside of the car now. Its located about 2/3 of the way down the side of car, rear deck portion.
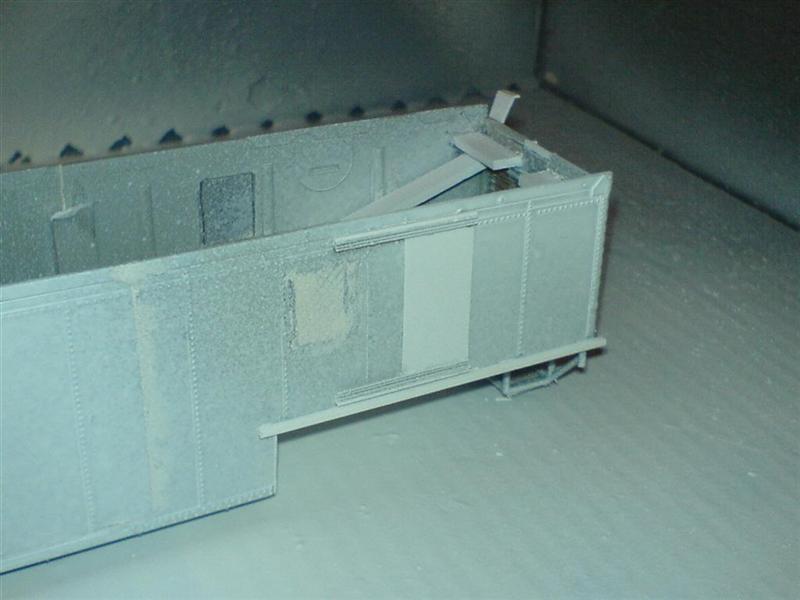
The sprayer nozzles present more of a challenge, I built mine with small chunks of the .060"x.188" styrene strips, and a scale 4x4 & scale 2x2. They are "held closed" with another scale 2x2. There are only 2 on the front of the car.
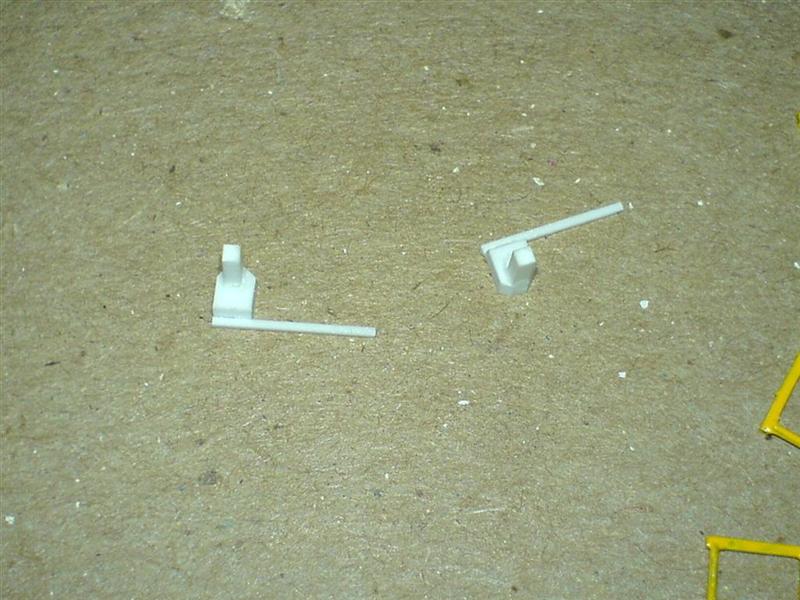
The pipes on the underframe are fun. I cut the pipes to fit the first 3 spaces on the "A" end of the car. After the 3rd space the pipes bend outward to the edges of the car, and follow the edge. To make the places were the sections of the pipe connect, use the .100" rod. There are 4, although I only modeled 3. On the brake end of the car, the brake side (also the uncouple lever side) pipe bends inward to clear the uncouple lever plate. This side of the car also has a smaller pine, use the .040" rod to make this line. It is a bit more complex, but generally follows the larger pipe, see the picture below. You can carefully cement these on now, but I suggest waiting until the car is fully assembled.
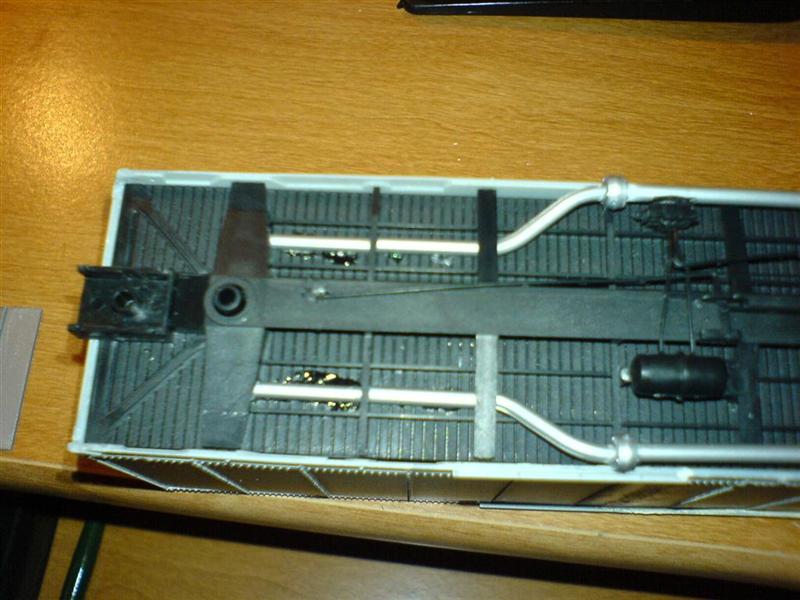
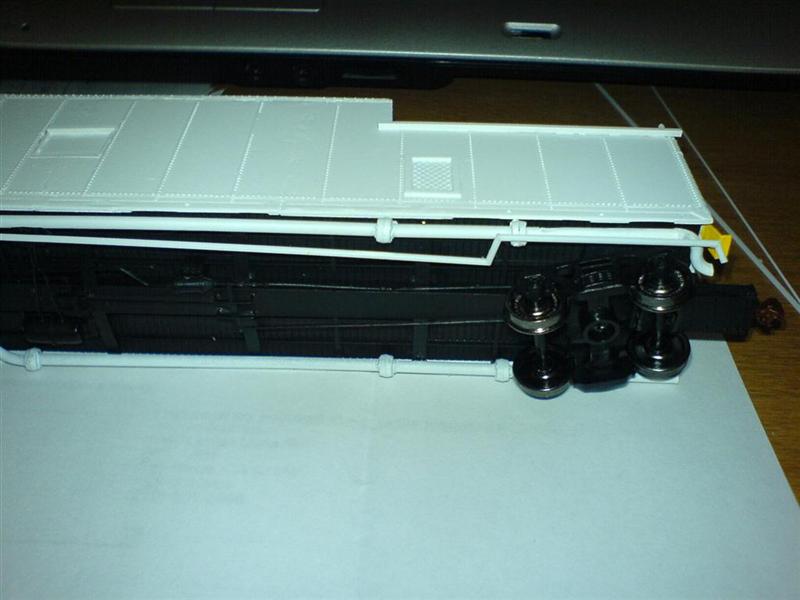
Rear deck... This requires some imagination, I've so far left out the details on mine, beside the compressor & cage covering it. The cage is made from .040" rod & a section of etched metal grill attached to the top. The compressor is just a few styrene bits I had laying around that looked similar. (Note: I'll add the rear deck detail once I add it to my own car.)
Part 4 Assembly
Once you've gotten the parts cut & pre-assembled, you can start the final assembly. Carefully cut out the window & door holes. Cut the door holes first as you'll use the top as a guide for the top of the windows. The side doors will then be framed with scale 2x2's on the top & sides. The rear door is framed with a scale 2x4 on the brake wheel side, a 2x2 on the other side & a 4x4 on the top. The sliding door should already be cemented in place.

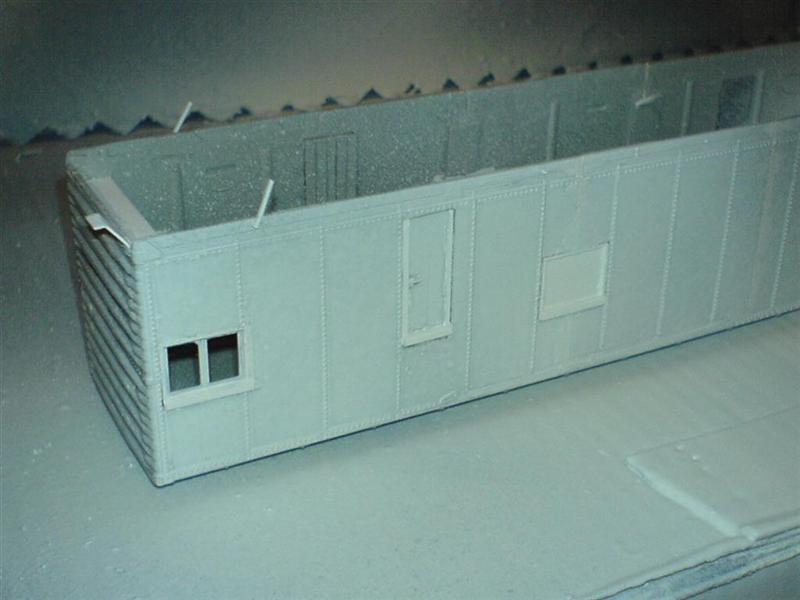
The rear vents & single side vent are cut in & framed with scale 2x2's.

The side windows are cemented in place and any gaps filled & sanded. Now cut the front window hole, and carefully place it in the hole, then cement the roller door in place, trimming any excess off the door guides.
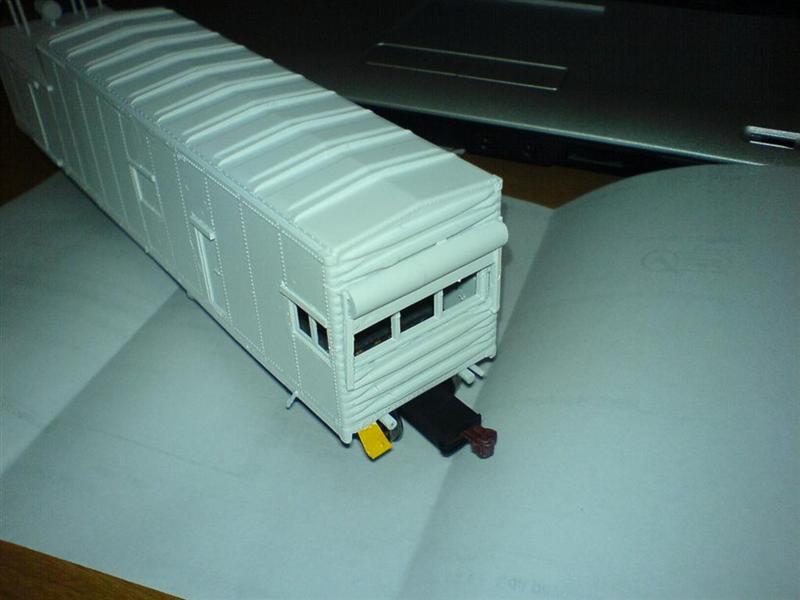
Cement the compressor & compressor cage in place. Once the cement has dried paint the body flat white. At this time, while the body is drying, paint the ladders yellow. Once all the paint has dried, carefully cement the ladders in, remembering that the front four are 3 rung ladders, the side two have 4 rungs and a slightly extended side to the top, and the rear have 4 rungs with the longest sides, the extra room to the top again.
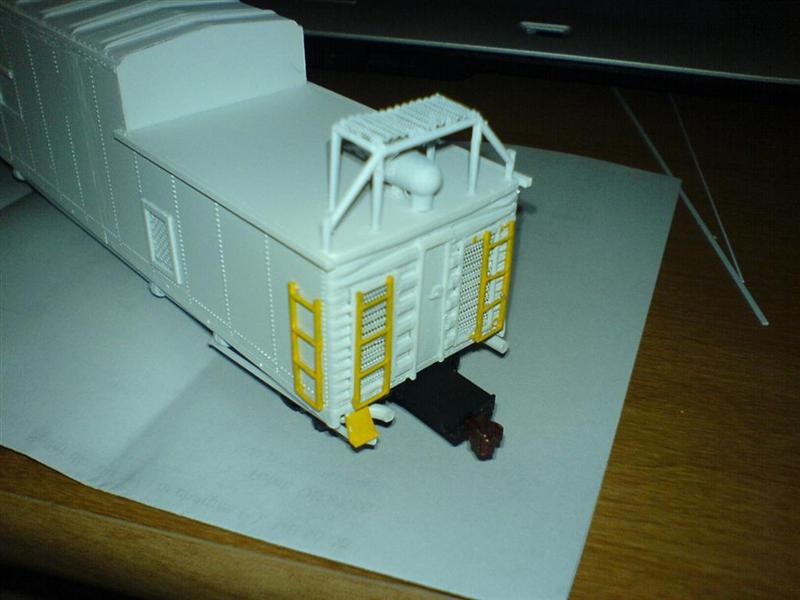
Assemble the underframe, with the pipe cemented in the first 3 spaces of the "A" end of the car. Trim the stock coupler boxes down a hair, and cement in the cushion pockets. The pockets call for you to glue the cover on, I only glued the outer corners & used the stock coupler box screw to hold the other end on. Paint the pockets flat black.

Once all glue & paint is dry, slide the underframe into the shell.
Part 5 Last details
Now cement the sprayer nozzles in place, aligned with the truck kingpin of the front of the car. Now you can cement in the pipes to the underframe, I made sure not to glue them to the shell, just incase. Cement the rock flap to the cushion pocket, just in front of the cut lever plate, the lines would come out just above the rock flap. Using the .015" brass wire, hand bend it to make the handrails on the sides of the car, near the doors. You can also use it to make the drain pipe on the brake wheel side of the car, about 1/3 down the rear deck. Carefully glue the 25lbs test fishing line in place, to replicate hoses on the car. Paint them to the appropriate color. The line may require some sort of paint adhesion spray before painting to ensure it does not crack if bumped.
Part 6 Extra Details
You can add the coupler walkways, which are painted yellow. There's also the option for the car air line, and replicating the hoses connecting the tank cars to the sprayer car. The stirrup steps have been left off, as you'll need some thing like .010"x.030" brass strips to make them look correct. Also you can add the coupler cut levers since you added the lever holding plates.
Part 7 Decals
I'm in the process of producing the decals for ATEX 0006 for myself, and may offer mini decal sheets for this car, with extra numbers to model the other cars. Please contact me through the forum if you'd like to pre-order some. Thanks for reading, and now you can have a weed train too!
©2006/2020, Josh Baakko, https://www.modelrailroadtips.com

