Starting A Layout Part 2
An article by Stephen McCallum aka fsm1000. This is an authorized repost of his article, which was originally posted on his website which he is now planning to close
Ok now comes the fun part. Don't worry, we will be making the real thing VERY soon.
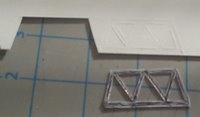
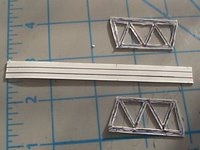
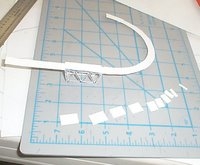
First off we make a bridge.
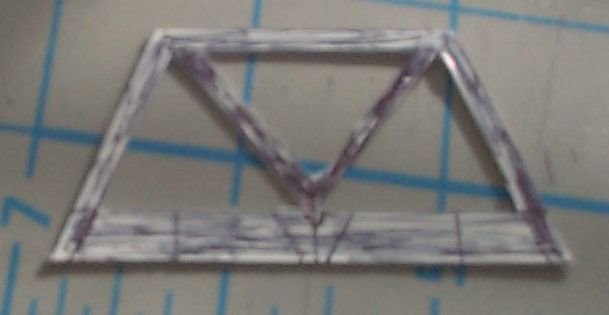
Then make a copy using this one.
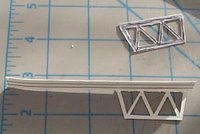
And make two more so you can glue them together so they are stronger.
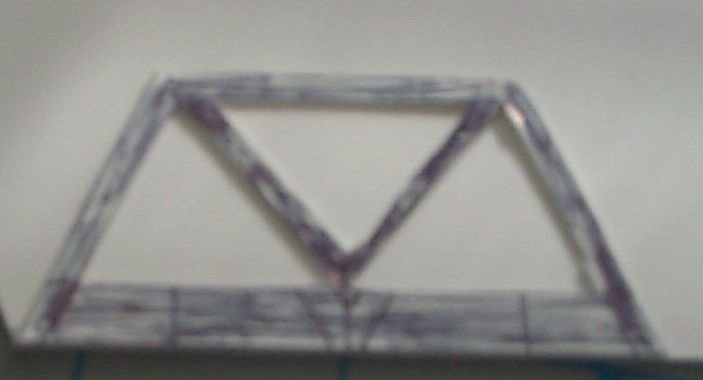
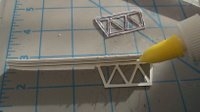
Now you can add a strip of straight track to the bridge. As you can see I use tiny drops of glue. All you do is let out a tiny bubble of glue and just touch the edge. That's all you need.
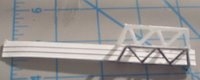
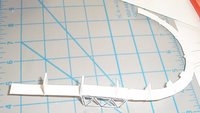
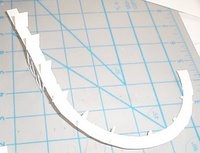
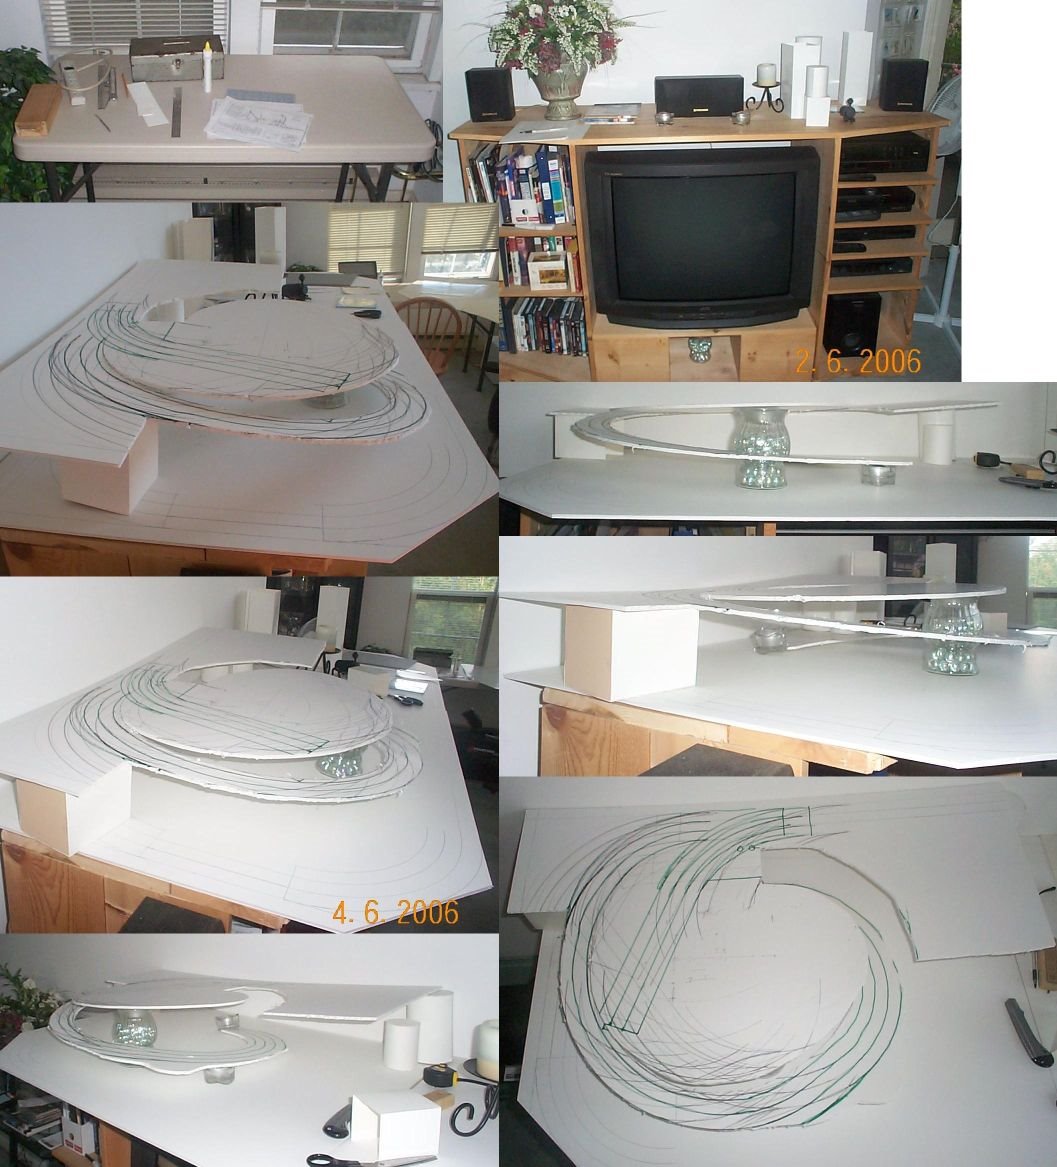
I added the curve. As this is going up we need to add supports. I cut out some at 0.5, 1, 1.5, 2, 2.5, 3, 3.5 on up to 6 inches in 0.5 inch increments. I guessed-a-mated- where they should go, putting them equal parts away from each other. Then I glued them on.
Next I made turnouts. For these I used no. 4 turnouts and measured them from the frog to the point. I also measured the width at the frog. From this I got the measurements 7 inches long by 3.5 inches wide. Using that as a template I made left and right handed turnouts.
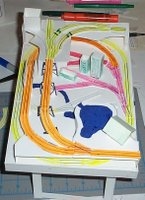
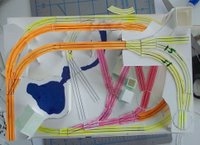
I knew where to put the track because I drew it out full size earlier as explained in 'how to make a layout'. I put in a trestle. I colored the track.
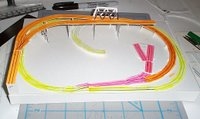
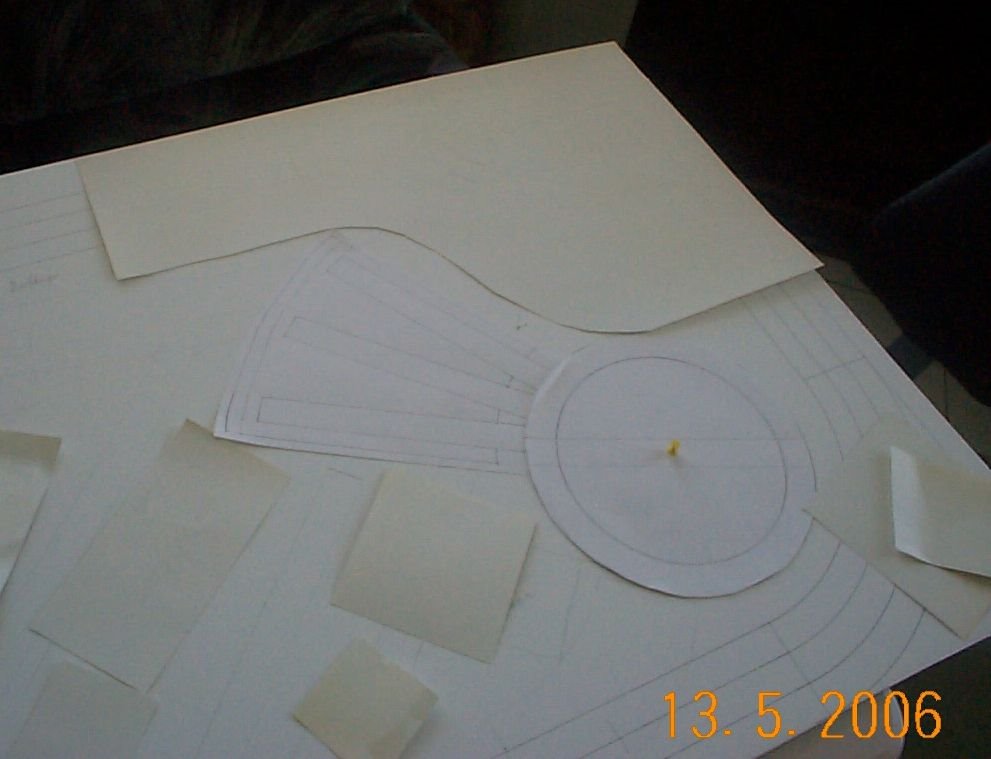
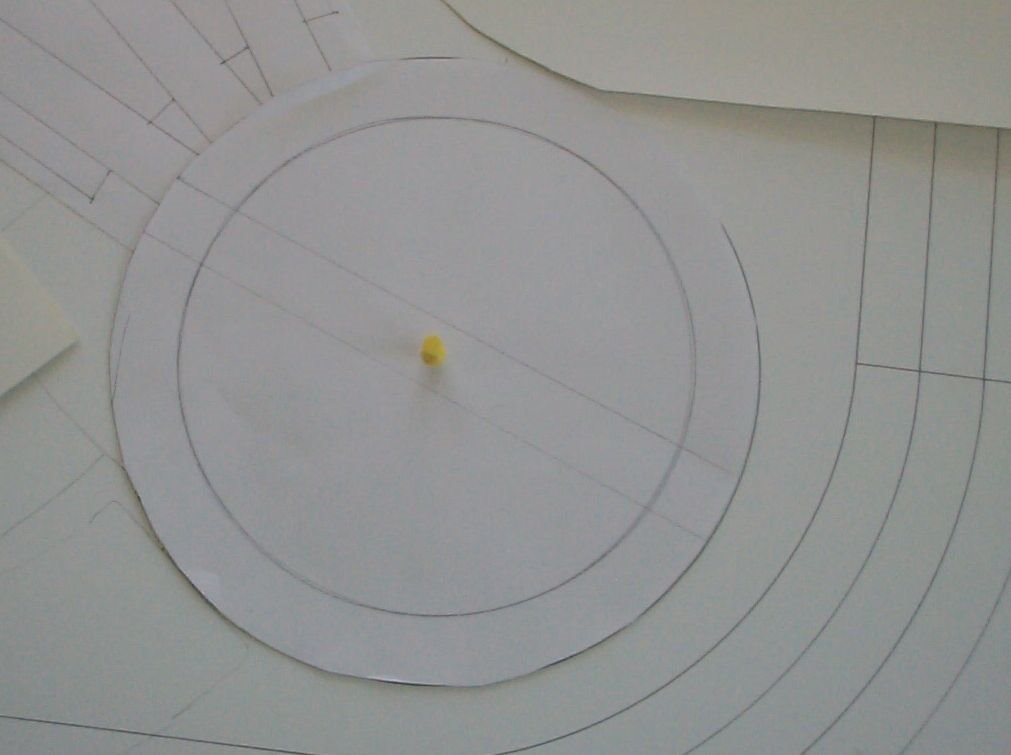
Added the turntable and roundhouse as well. Notice that one of the curves is not 18 inches. Because I want to make separate areas for different locos the one curve is 12 inches inside rail radius. As opposed to 12 inches center line radius.
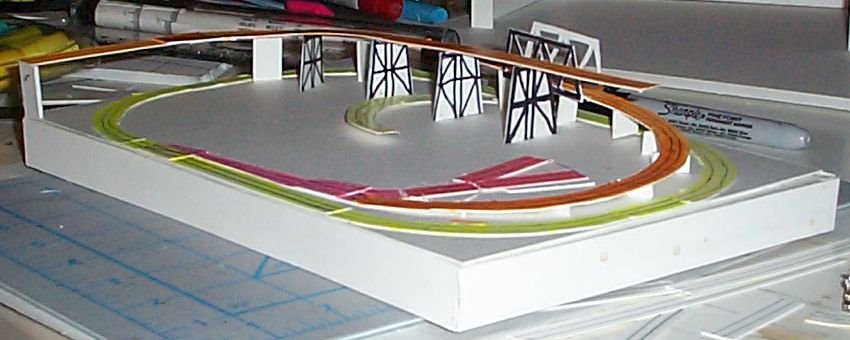
Added more buildings to make sure they fit etc. A large pond and stream with the obligatory waterfall.
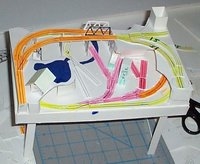
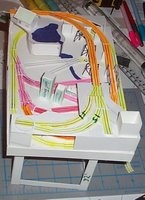
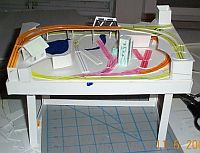
Now we have a completed layout. Benchwork, track, buildings and some scenery. You can actually use this now as a template and measuring this you can use it to figure out where things can go.

For instance, I know the following:
The layout calls for about 36 feet 9 inches of track. And as I am laying my own ties and rail I will need... With a tie every 24 scale inches that is 882 ties. Including the long ones for the turnouts.
At a tie every 22 inches that is 962.8 ties.
At a tie every 18 inches that is 1176 ties.
How far apart you want to space them is up to you. The average is about 22 inches. 3/8ths of an inch is 18 scale inches. 7/16ths is 21 inches. 1/2 is 24 inches. This is the space on center, not between the ties.
So with 36 feet 9 inches I will need 73 feet 3 inches of rail at least. This comes to 25 pieces of 3 foot rail. But I would buy 30 probably. At about $1.80 a rail for code 100 say, that's $54 plus 15% tax.
At least now I know. I also know better the sizes of the buildings and which ones I can model (some are not on this one yet) and so I can make a mock up and know what and how much wood to buy. I also know what wood I will be needing to make the stand, the box frame and more.
All from spending a few hours making this and honing my skills in the mean time.
Next we will make full sized templates to see if it will all fit where we want it to. Ok, now comes the fun part. The building.
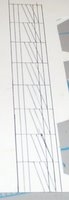
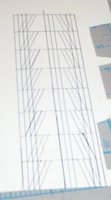
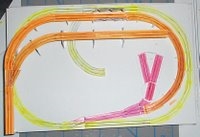
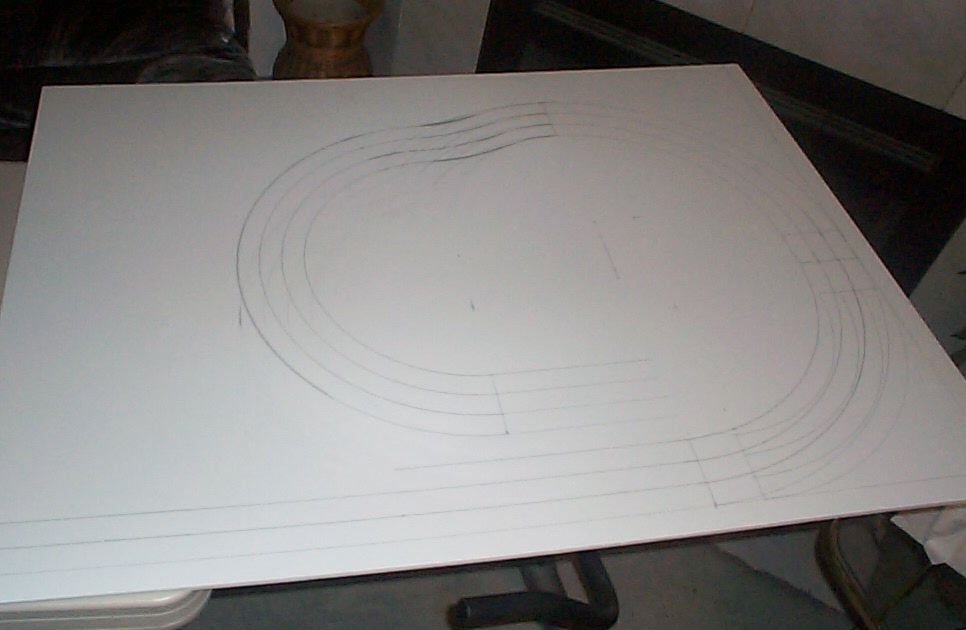
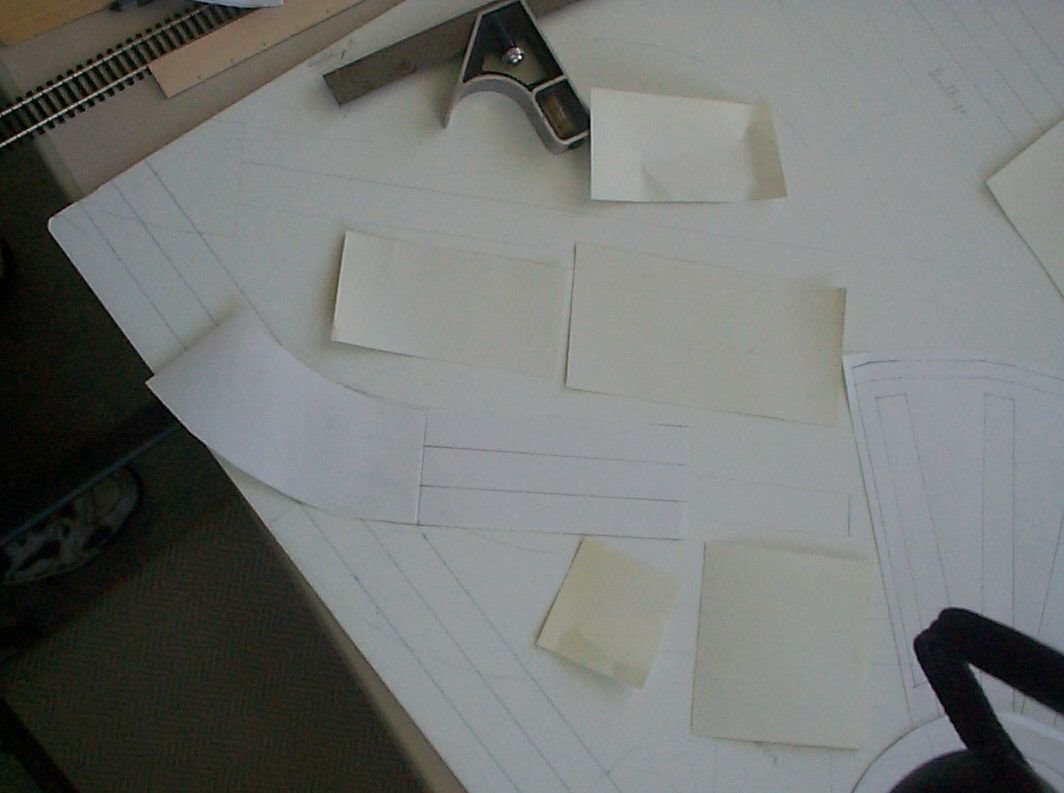
I start with paper the size of my layout and I draw it out full size just to make sure things will fit. I also buy foam core board or bristol board and use that as a template for my railway as well.
I found this little gadget helpful for making small circles as well.
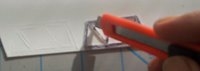
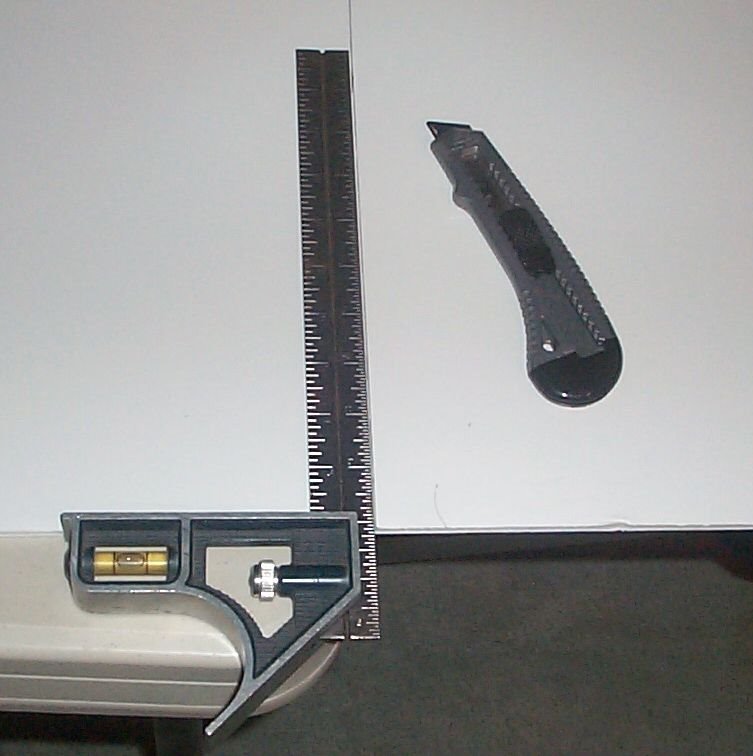
For straight lines and square corners use a ruler and a square. Also always use a sharp knife when cutting.
Start with a blank piece of foam core.

Draw out your layout full sized.
This is the tool I used to make my circles for the radius in some places. I also used a yardstick with holes in it.

Always use a SHARP knife and a ruler for cutting.
By laying things out full size you will know if they fit or not.
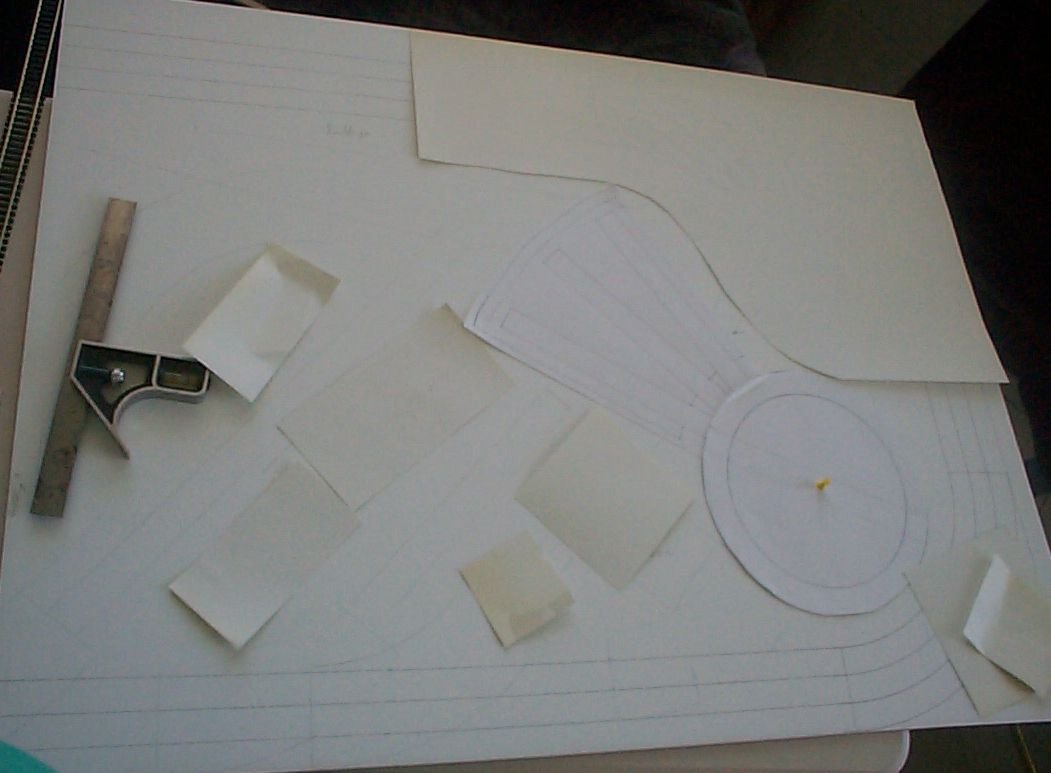
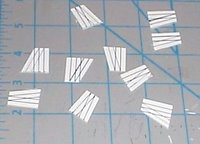
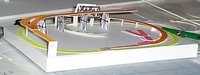
Use templates of things like buildings, turntables etc.
Make sure you allow for side clearance on all curves and turnouts so that buildings and scenery are not hit. I make the templates wide for things like this.
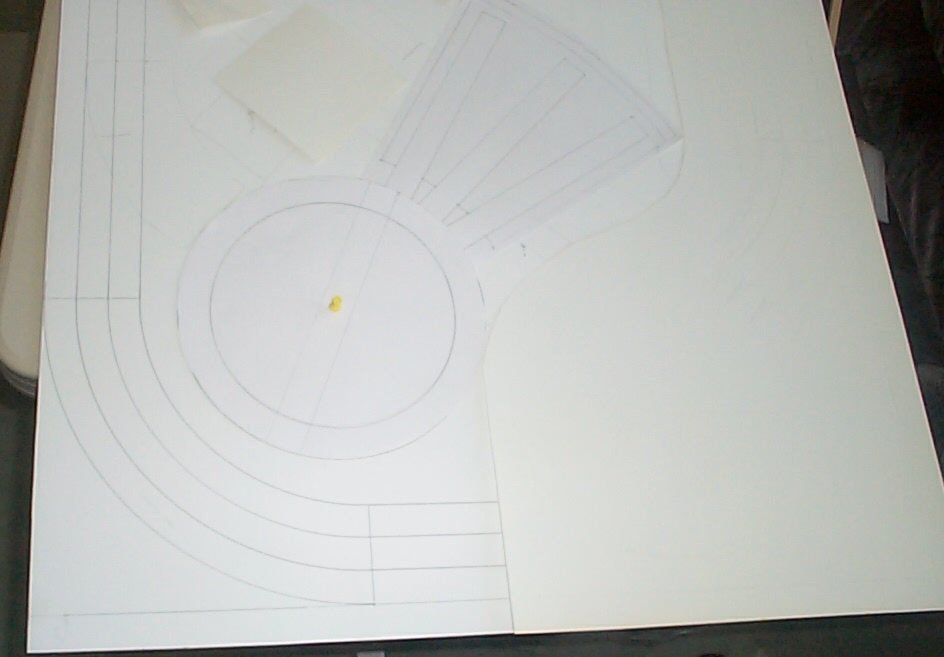
To make sure the turntable lined up properly to the tracks, I put a push pin in the center and rotated it.
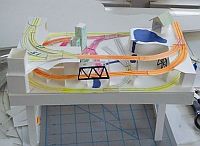
Laying it out full size you can SEE where everything goes. You can see how I am testing a turntable, roundhouse, and some pieces of paper representing a coal tower, sandhouse and water tank.
Ok so now we move on to mock ups. I do this to ensure that I can actually get the buildings I want on my layout, actually ON my layout, It removes surprises later.
One way to do it is to use foam core and paper or bristol board. As you can see I use a scale rule and a self healing cutting mat. You can get the mats at hobby shops or at sewing centers.
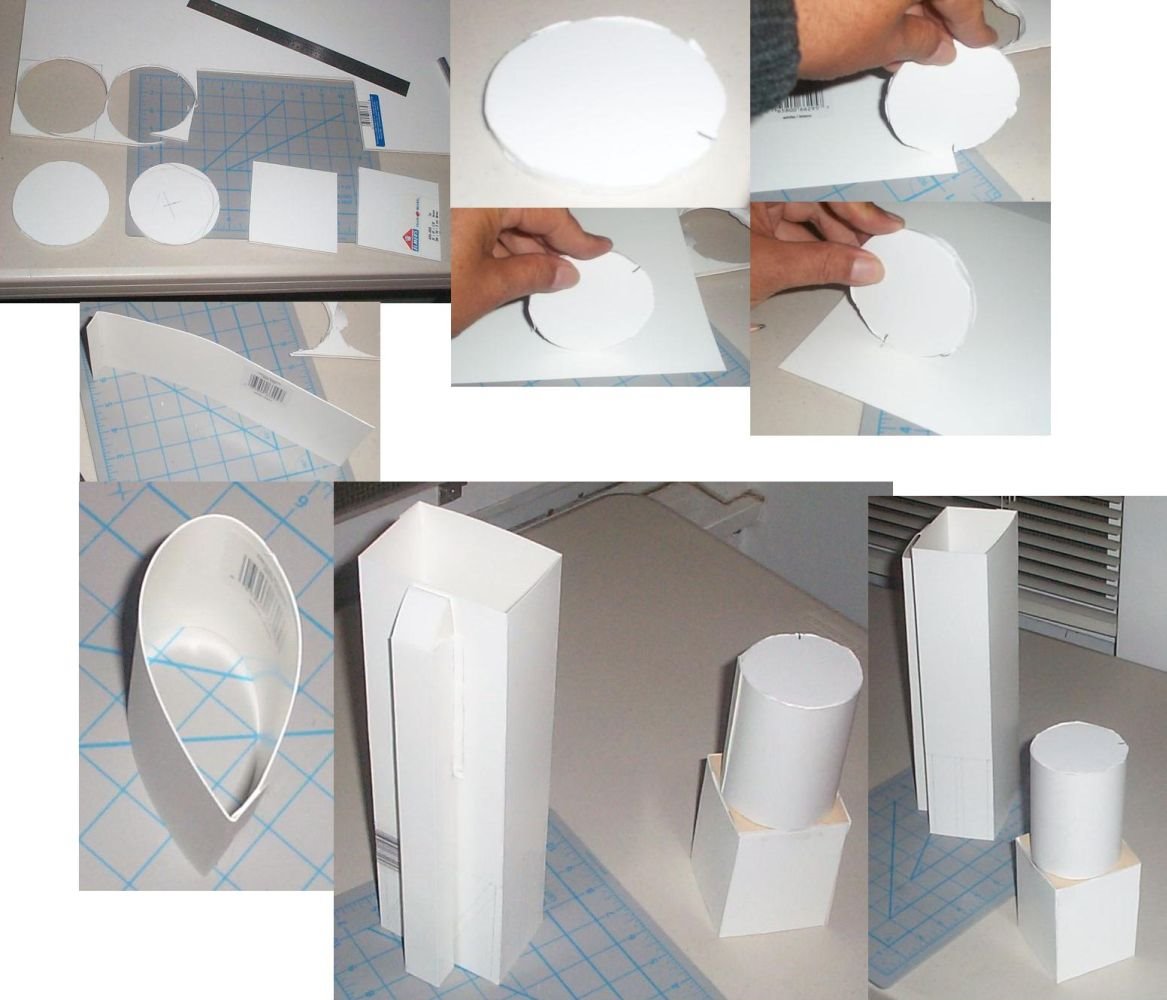
Next we will make a mock up of a water tower and a coal tower. Ok so first cut out a circle. Next put a line on the edge. Next put the line on the end of a length of paper and roll it until the line touches the paper again. This give you the circumference. Mark it with a pencil and add about 1/2 an inch.
Ok now cut that out. Make sure it is as high as you want the tower to be. Fold over the edge and glue it in place. Ok after it dries, in about half an hour, then slip in the round pieces you cut out earlier.
The base is just folded paper as is the coal tower. Only thing to be sure of is the basic dimensions.
You don't need a huge place to work in so long as you keep it neat and tidy. The place where I was going to put the layout was originally here on top of the entertainment unit I made.
You can see that I made two sizes of coal towers and water tanks. The first ones were way too big and so I made two smaller ones.
I like to make templates of my layout and then cut it out to make sure it will fit. Like this.
Well that's it for now. As I have access to a larger area I am doodling out some new ideas.
The principles are the same though, no matter where or what size. Doodle, make mock ups and get large sheets of paper (or tape small ones together) and put it out full size.
NOW is the time to make changes. NOT after you put in hours of work, laid the track, put in scenery etc. etc. etc.
©2009/2020, Stephen McCallum, https://www.modelrailroadtips.com