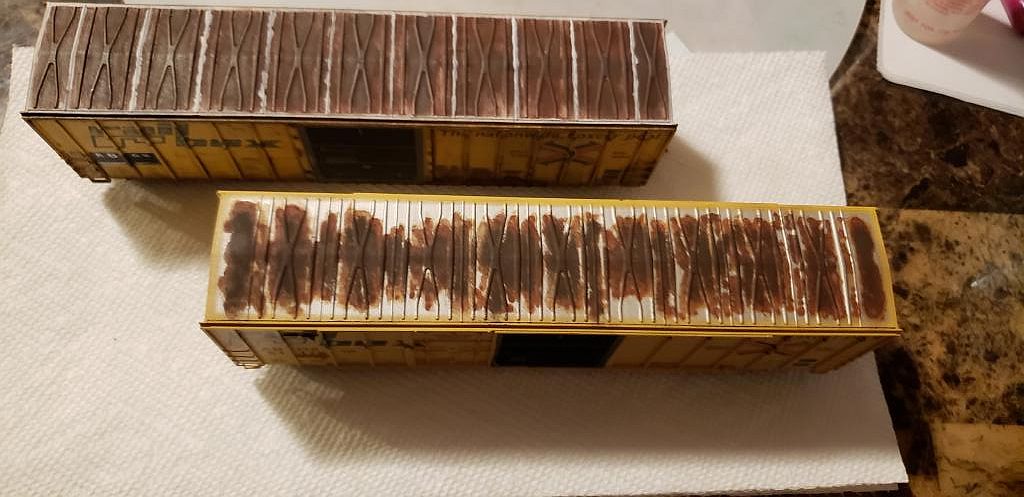
Weathering A Boxcar Roof
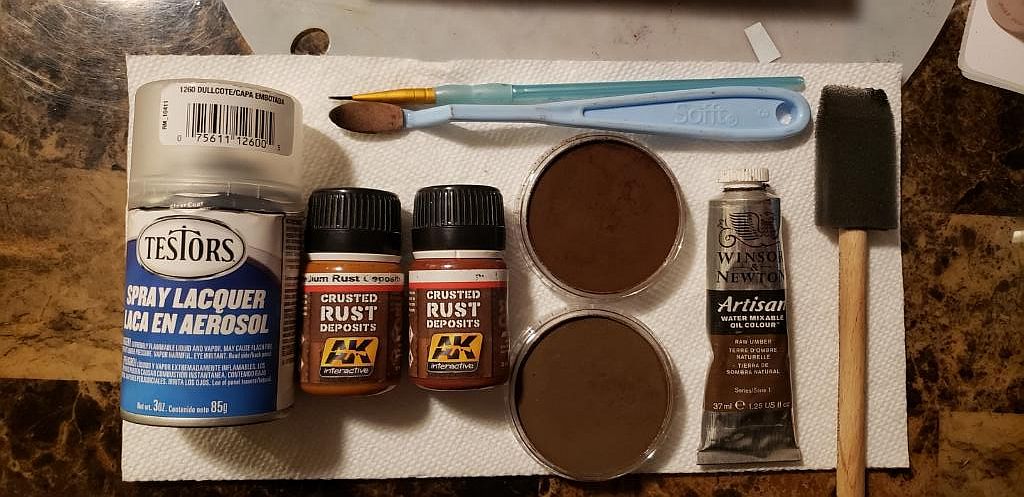
Products used to weather up a roof
- Testors dullcoat
- AK interactive crusted rust deposits (medium and dark)
- PanPastel (burnt sienna ex. Dark & red iron oxide ex.Dark)
- Water based oil paint (Raw umber)
- Soft medium paint brush
- Artist sponge
- Make up sponge
So to begin, you'll want to grab the can of dullcoat and your boxcar. To apply the dullcoat hold the car about 12” away from the can. Spray on a good coat, making sure not to apply too thick of a coat. It should take about 10 minutes to dry, so during that time grab the bottle of AK interactive medium crusted rust paint and shake it up good.
For the next step you'll need your soft medium brush and the AK interactive medium crusted rust. This is where you are gonna put a good amount on your brush, applying it to every spot you want rust to be. This is what I would consider your rust map or outline. The reason I say this is because with the next paint, you will apply it just up to the edge of this lighter color. You might notice some inconsistencies in this first layer but do not worry, the next layer will cover most of this first layer. Using either a white spirit or paint thinner, clean your brush off.
For the next step you will need the AK interactive dark crusted rust and the same brush, making sure to shake the bottle up good. Once you have dipped your brush in the paint start from the middle, moving it towards the edge of your first layer of paint. Make sure to leave a little of the first layer showing slightly on the edges of your outline , as it will add to the realism. You might see some inconsistencies with this layer as well, don't worry because the next step will cover that as well. Clean your brush off, again with either white spirits or paint thinner. You will no longer need this brush.
For the next step you will need to grab the make-up sponge and the PanPastels burnt sienna. Dab the make up sponge into the pastel, get a good amount on there. Using a straight up and down motion, dab it on to the layers you have already put down. You will see the pastels start to grab on to the paint, giving it a nice darker look. As you go along make sure to blow or softly brush off any excess pastel that may be left over. Once you have covered every spot you would like, to achieve the desired look, you may put another light coat of dullcoat to seal the first 3 steps. Not required but does help build up a nice layer of dullcoat.
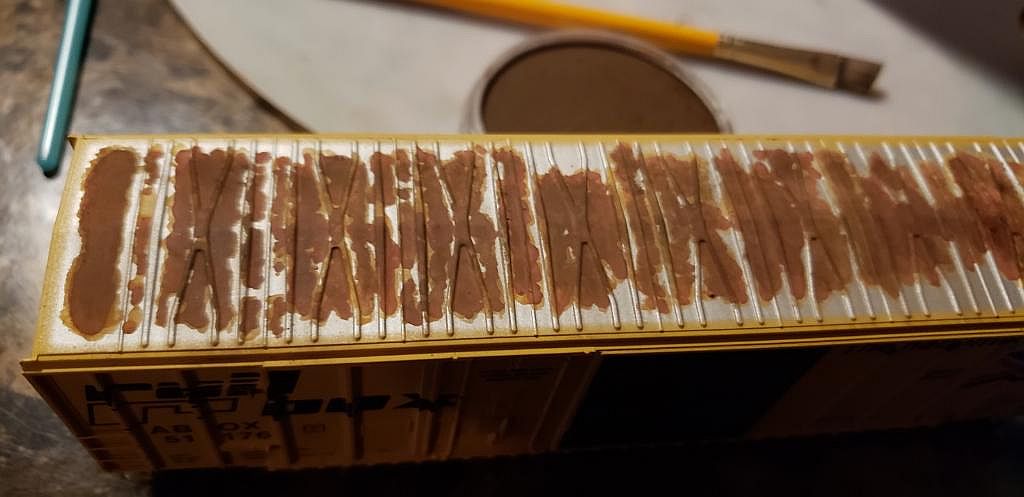
At this point your model should look something like this, as far as color and texture.
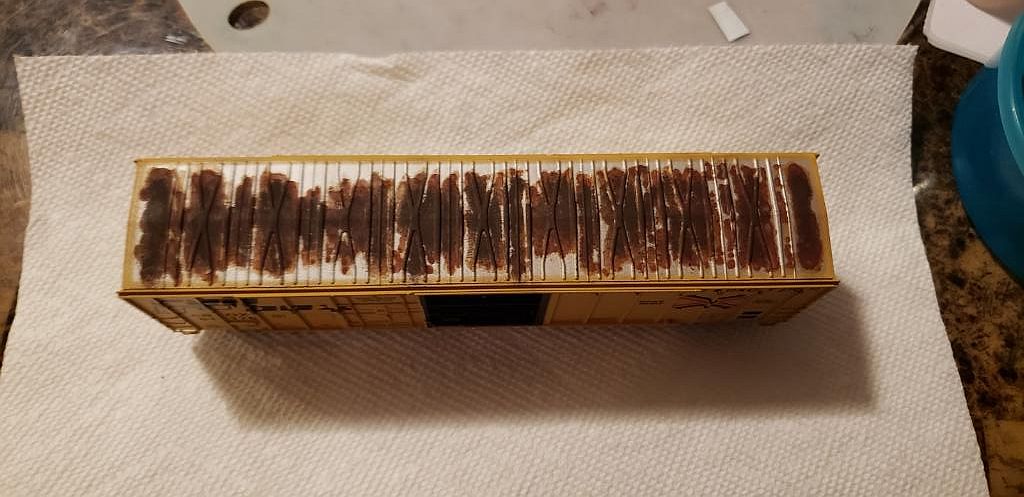
On to the final few steps. You will need your oil paint and artist sponge. Applying a little amount to the corner of the sponge, you will apply it to the darker spots of the roof. Once oil is on the car, use the clean corner of the sponge to dab it down so that you have a nice thin coverage. The oil will be shinny but the next step will dull it down. Once you have finished applying the oil paint to the desired areas and let it dry for 10 minutes, you will be on to the final step. For this you will need the pastel red iron oxide and the make-up sponge. Using the same technique as before dab it in an up and down motion into the oil paint. Blowing or softly brushing off any extra pastel that may be left over. Seal this all in with a final coat of dullcoat and you'll be finished. Remember the L&L method. Layers & less is more!
Follow @rusted_rails on Instagram for more tips and custom models.
© 2019, Robert Pierce, https://www.modelrailroadtips.com