HO Scale Concrete Segmental Bridge Side-by-Side Comparison
Products from Scale Segmental Bridge Co. and BLMA Models (now Atlas).
This side-by-side compares two concrete segmental bridge products on the market for HO scale modelers, thus allowing you to choose which would be better for your layout.
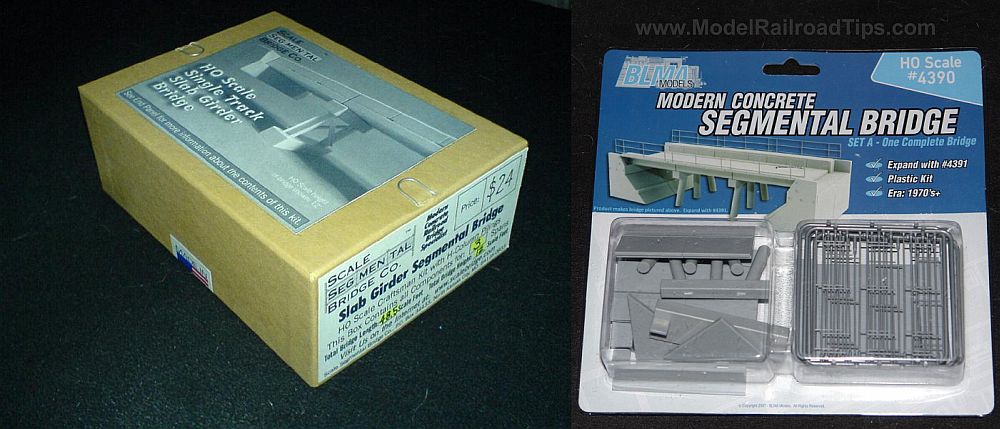
Concrete segmental bridges are a major player in modern railroading, and are quickly replacing wooden trestles through out the North American railway system. HO scale modelers have a choice between two amazing products, from Scale Segmental Bridge Co, and BLMA Models (now Atlas). These models represent differing styles of bridges, abutments, and piers.
While the Scale Segmental Bridge Co version is currently out of production, my hope in republishing this, and a future short article detailing my use of one of these bridges might get Keith back in production! https://www.scalebridge.com/
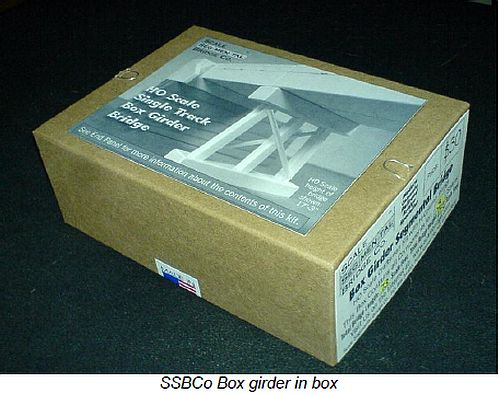
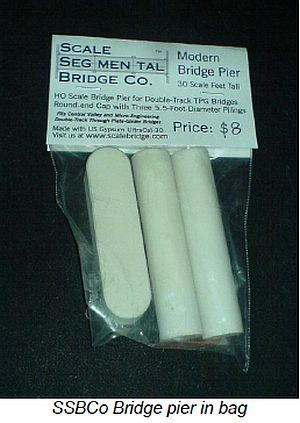
Scale Segmental Bridge Co offers box girder, slab girder, and T girder bridges. The box girders come in 3 sizes, 18', 20' and 28', and come with your choice of tubular steel, H column, or square pilings, and have short abutments. T girders come in 23' sections, with straight abutments, and your choice of H column, 38” diameter round, or 24” octagonal pilings. Lastly there's the slab girder which comes in 14' segments, and includes a small block to raise it to the height of the box girder sections, or, small abutments to match the size of the slab, and have H column pilings.
The BLMA Models (now Atlas) version represents a slab girder bridge, in 3 sections, totaling 50' feet in HO scale (14' sections). It includes an L shaped ballast side wall with tubular steel railings. This style side wall is common on BNSF's Cajon Pass division. It is molded in plastic, and includes round pilings that are around 1 ¼” tall.
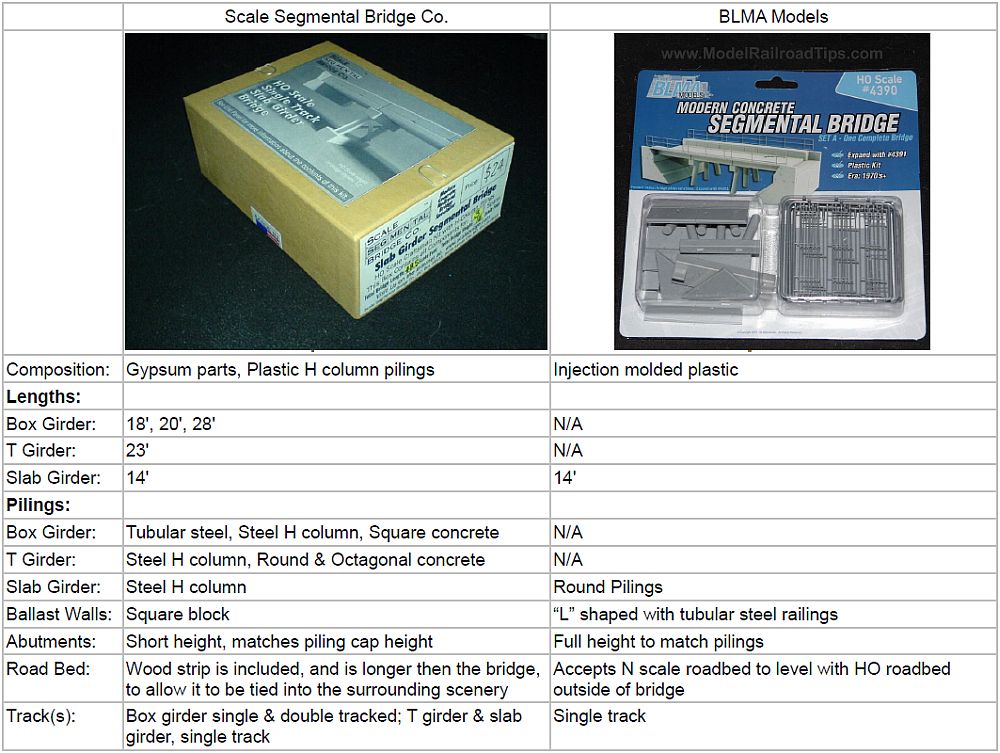
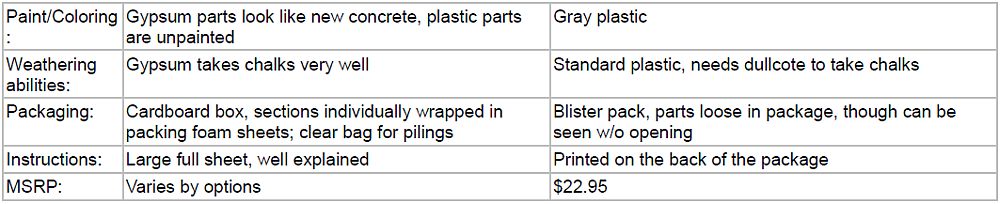
Side-by-Side Comparison:
Review of each product:
The Scale Segmental Bridge Co (referred to later as “SSBCo”) product is great when it comes to replicating the look of concrete, that's one distinct advantage of the gypsum. Keith does a great job in hand crafting each section, and its all done here in the USA! The options for pilings are a plus, as not every bridge uses the same pilings. The partial height abutments are easy to blend into scenery, and the pilings are easily attached to the caps.

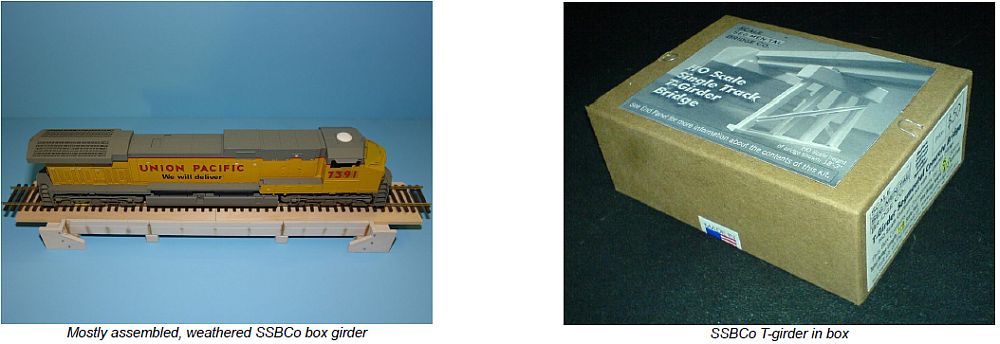
Initially, Keith contacted me about reviewing his product, happily, I agreed and he sent me a kit. My single track box girder, manufacturer's sample included two 18' end sections, and a 28' center section, with two 11' tall H column pilings. One of the 18' sections got chipped near the end, on the outside of the ballast wall, however, I feel this added to the character of the bridge. The bridge sections are weathered with chalks from Tamiya, and the retainer plates installed and rust streaking completed below them, and since Gypsum takes chalks well, the weathering can be accomplished with out any protective coating.
I assembled my box girder sample with Walthers Goo (though the instructions suggest Tacky Glue). The sections all matched up and with the Goo between, remain structurally sound, even with out the included roadbed. The roadbed included is a strip(s) of 1/8” thick basswood, and should be used to help retain the rigidity of the bridge. Once the roadbed is installed, the track will be secured to it, and it should level the ties off with the ballast walls, which, according to the instructions, is the way these bridges should look.
The pilings had to be painted, I opted to primer them with Rustoleum Rusty metal primer, then do a sea salt mask, and paint them bare steel. Once dry the sea salt was removed to expose the “rust” underneath. Weathering was finished up accordingly to make it look like the pilings were rusting a bit. The retainer plates were painted at the same time, with Testors silver and touched with some rusty paints & chalks.
I'm not entirely impressed with the wood roadbed, I'd prefer to use Woodland Scenics foam roadbed to absorb the shock of trains crossing the bridge. For one, the wood needs to be sealed to avoid warping. I thought about using a thinner strip, but its just not feasible, the wood roadbed is there to support the bridge, and the thickness leaves no room for any substitute. N scale foam, or cork roadbed is roughly the same thickness as the wood strip. Recently Keith emailed me to inform me about a rubber floor mat material that he may include in place of the wood.
The BLMA Models (now Atlas) product is injection molded in gray plastic. It assembles easy, and instructions are easy to read. The instructions are printed on the back of the packaging, and include color photos.
Assembly went fast, much faster then the SSBCo version. BLMA recommends CA, I used liquid plastic cement, and it worked just fine. I left mine fairly modular (as I did with the SSBCo Box girder), by leaving the roadbed detached from the pilings and abutments.
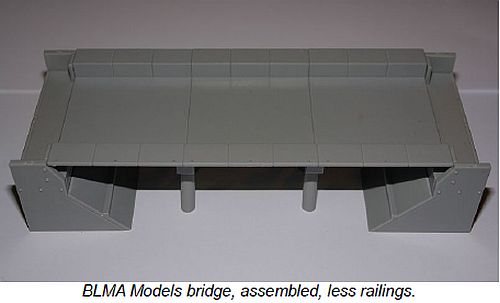
The design of the BLMA bridge replicates the look of the bridges on Cajon Pass better then the SSBCo slab girder, as it has the L shaped ballast walls with railings. The railings are finely molded plastic in a dark grayish-silver color. I left mine off to avoid damage while its stored prior to actual use on my layout. This also makes it easier to paint & weather the bridge prior to install.
The extra lip of the installed bridge sections confused me at first, since there's nothing in the instructions indicating why it was designed this way. I then realized what it was, the thickness perfectly matches the difference between HO & N scale road bed! You can lay HO scale road bed to either side, an N scale across the bridge, and the track will remain level. The BLMA bridge is noticeably thinner then the SSBCo version though it benefits from the additional strength of plastic.
The end abutments are molded to the same height as the pilings, so your bridge is set to about 1 ¼” of clearance, however you can easily bury the ends into scenery. Bolt detail is molded on unlike the SSBCo where you have to install them.
Weathering with chalks will require dullcoat, however paint will adhere like it does on any other plastic model.
Final Thoughts:
The SSBCo versions are more versatile, and have more options, and the Gypsum used is perfect for replicating the prototype, however it IS more fragile. The BLMA models version allows for cork or foam roadbed, and being styrene is quicker to assemble.
I've assembled test samples of SSBCo's Box, Slab, and T-girders, along with their bridge piers with round columns and round end caps. They quality of all products remains exactly the same, and you will not be let down by any of their products. Likewise, with all other BLMA products, you will not be let down.
The biggest deciding factor would be your prototype. The BLMA version models one specific type of slab girder with round piles, the SSBCo versions have more options, but do not include the railing version of the slab girder BLMA produces. I'm thinking you could use SSBCo's pilings on the BLMA version to better match a few more prototypes.
More Photos:
© 2009, 2019, Josh Baakko, https://www.modelrailroadtips.com