Repurposing a Great Northern Covered Hopper for Modern Service
How to redo a factory painted model that doesn't fit your modeling era.
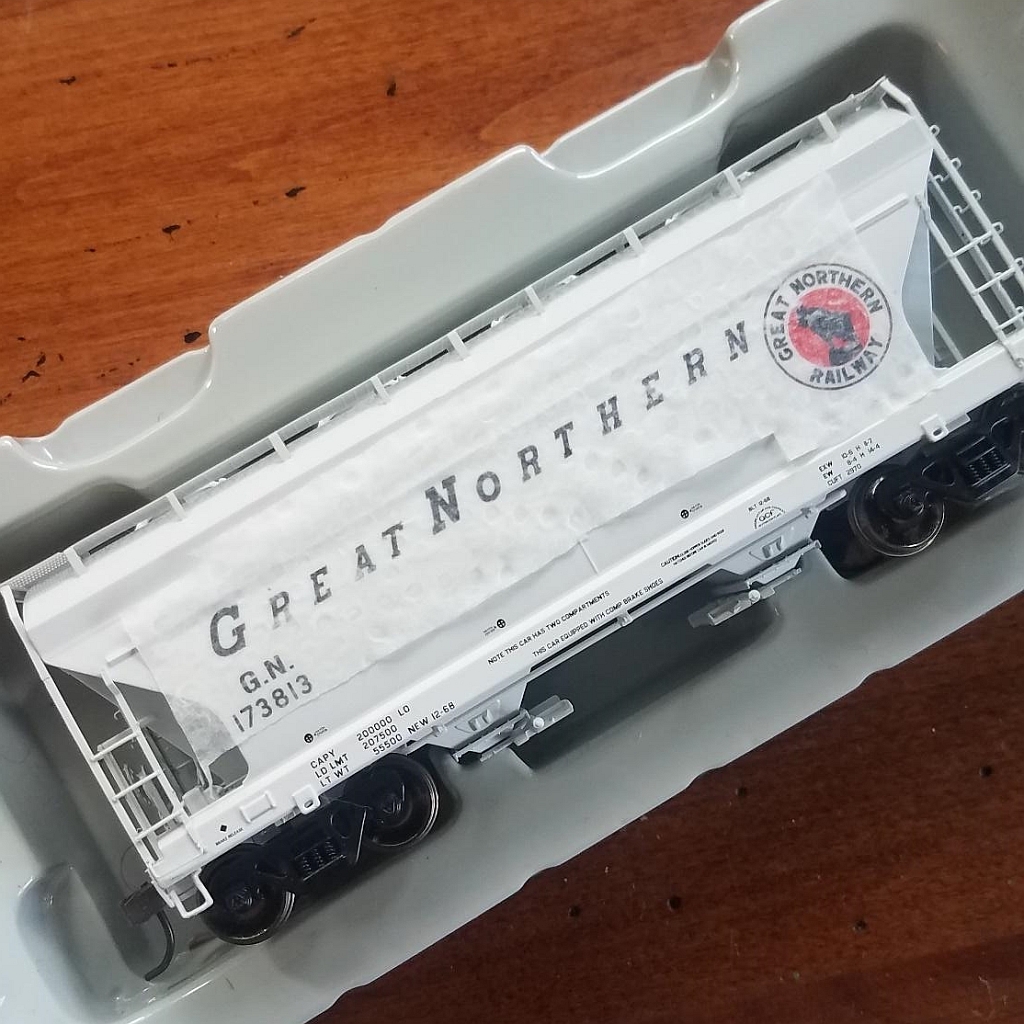
We all have models that are somewhat misfit to our interests. I was given a magnificent replica of a Great Northern 2 bay cement hopper by a well meaning relative a few years back. Though I model the modern era, I was touched by their generosity and could not bring myself to sell it or return it. I thought of several different ways I could work this hopper painted for a road 50 years defunct into my roster or layout. Static Display? Junkyard or abandoned? Whatever scheme I came up with felt unnatural and somewhat forced until I read an article on Patch-out modeling. Like a bolt of lightning the idea came to me to strip and patch this hopper as a car that had seen years of service.
I began by looking through many photos from http://rrpicturearchives.net/ as well as Instagram posts to gather a good idea of how two bay hoppers weather and fade as they travel the rails. What became apparent very quickly is that ACF hoppers such as this are frequently the target of graffiti artists for ornate and complex paintings. As I model the modern era, I was eager to include some prototypical (or perhaps proto-freelanced) graffiti in my manifest trains and focused my searches to include such prototypes that had been so decorated. I decided one side of my hopper would feature several paint patches and the other side would feature large graffiti exhibit and found according to prototype pictures.
With my photos picked out I set to stripping the famous rocky mountain goat and all accompanying graphics from the model.
Step 1: I softened the decals by using paper towel soaked in Microscale Industries Microsol, allowing them to sit for 15 minutes on the decals I desired to remove. I re-applied Microsol as needed to keep the paper towel moist, but not so much it would puddle or run down the sides of the car, possibly discoloring the basecoat of paint I wished to keep. [Ed: See Removing Factory Printed Letters or Numbers (Microsol) for a more in-depth article on removing factory applied lettering.]
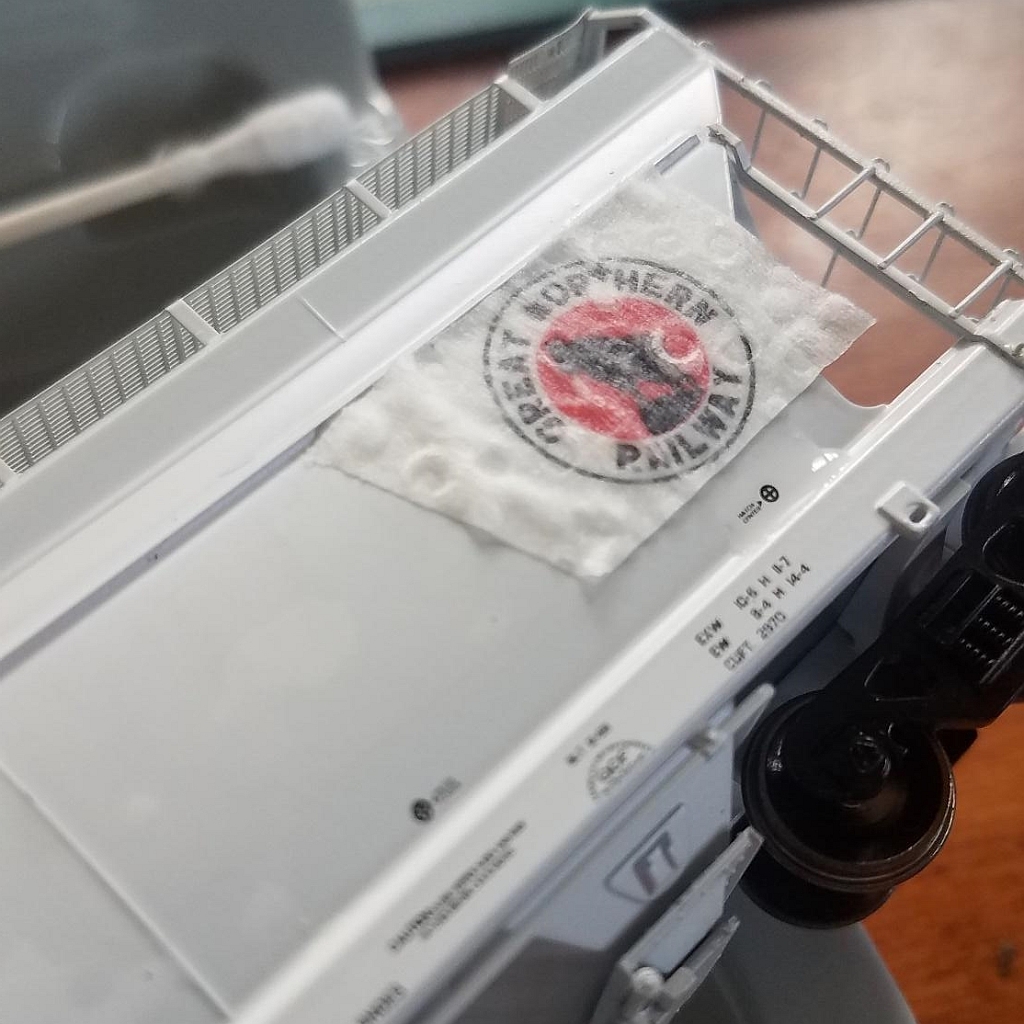
Step 2: After 15 minutes I removed the paper towel and checked the softness of the decals using a Q-tip or stiff bristled brush, if they did not lift easily I repeated step 1 until they were soft enough to remove with a Q-tip. After this I allowed the car to sit and dry for 24 hours.
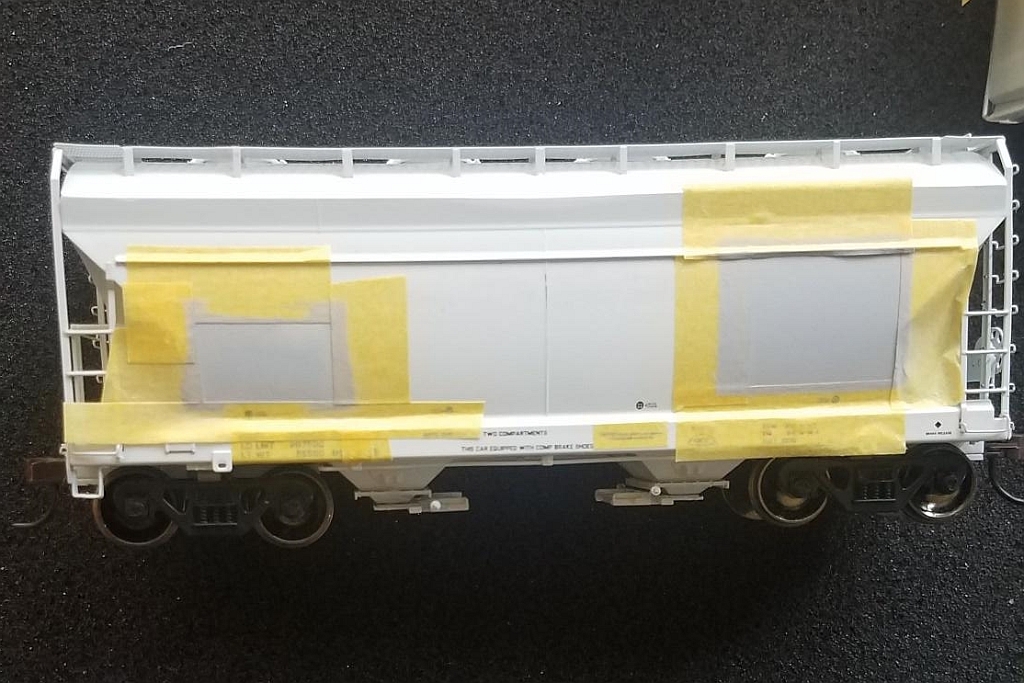
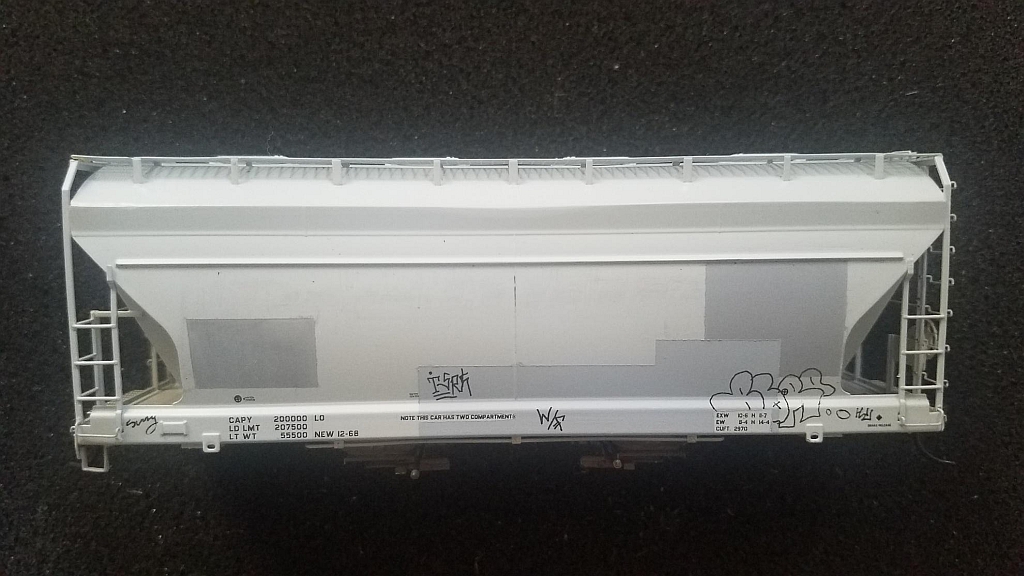
Step 3: The large red Great Northern logo did not come off very easily and left a permanent discoloration that I decided to paint over, and so initially masked and used Vallejo Air Neutral Gray to paint the patches on both sides as well as a patch square for new car reporting marks. I let this thick coat of paint dry for 24 hours before progressing.
Step 4: For the large graffiti on one side of the car I traced the contour of the entire piece on the side of the car using a mechanical pencil with soft led so no indentation would be left on the car side. Both in modelling and real life, spray-on paint is only fractions of a millimeter thick and I was keen to avoid lines or contours other than the preexisting contours of the car itself.
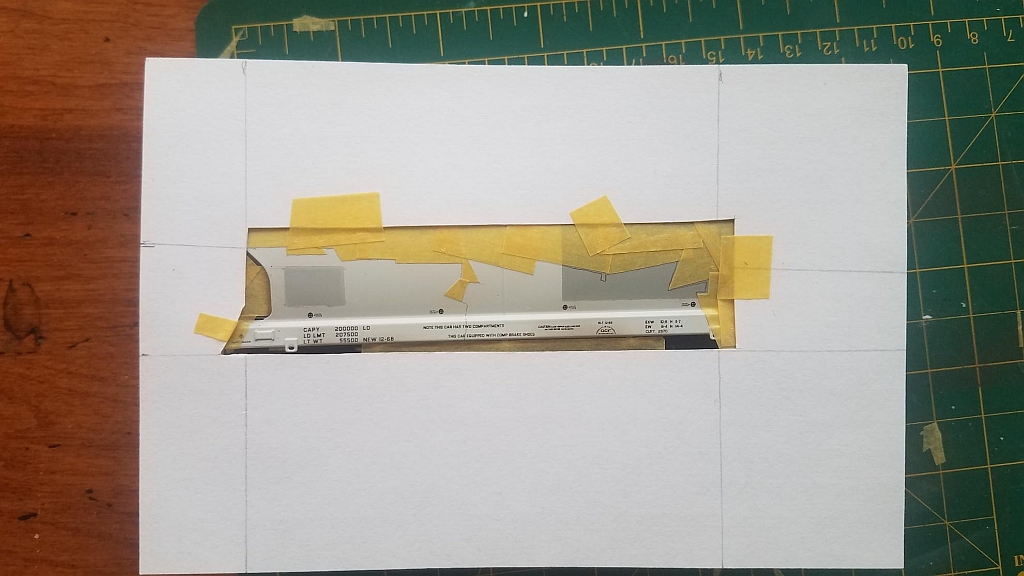
Step 5: After tracing the outline with a pencil I meticulously masked the outline of what would be the basecoat for the tag using 10mm wide masking tape. I would highly advise using a fresh No. 11 Xacto blade and a self-healing cutting mat for this step. Once the tape was in place, I burnished the edges to prevent paint from being wicked under the tape and mudding the otherwise crisp lines of the graffiti. I then masked the rest of the car using an index card with an appropriately sized slot cut into it.

Step 6: The prototype photo that I based this tag off was a mix of white, gray, with a contour of blue and black; however I wanted a more vibrant color and decided on a golden yellow for the primary color with black as the outline. I used 6 drops of Vallejo Model Air Medium Yellow with one drop of Vallejo German Orange mixed with airbrush thinner to create a thin yellow wash that I applied over several coats until I was satisfied with the opacity of the paint. I was careful to let the prior coat dry before applying a secondary coat. In all I believe I applied 6 coats with about 5 minutes in between to allow the paint to initially dry. I then allowed the paint to dry for a whole 24 hours before I removed the masking tape.
Step 7: On the other side of the car I masked off a section of the lower section of the car that I had seen painted on prototypes in an effort to cover previous graffiti. I mixed Vallejo Model Air Neutral Gray and White to create a lighter shade to create contrast from the first patches, creating three different shades of paint on the side of the car. I repeated the masking and painting techniques used in step 6 and allowed the paint to dry for 24 hours.
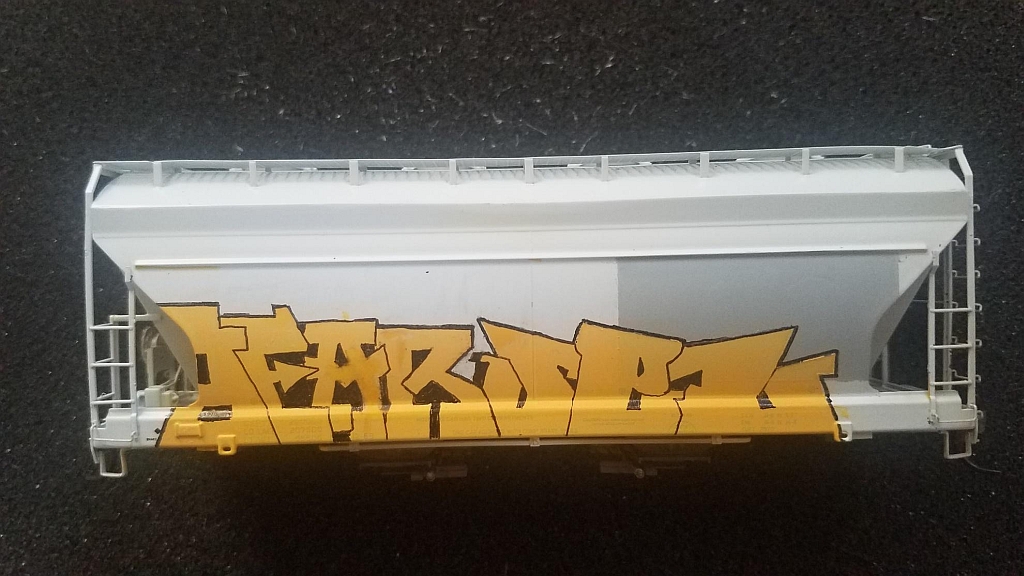
Step 8: Using fine art pens for fine scale tags, scribbles and line work was recommended to me by railroad modelers. I used Sakura Micron pens in the .08, .01, and .005 sizes. These pens are excellent as their ink is resistant to fading or cracking as it ages; however, takes some time to dry. It takes a careful and steady hand to prevent smearing the fresh in (don’t ask me how I know this). I carefully filled in the areas of the graffiti and added some small scribble tags to the other side of the car to provide a sense of time since it was last patched.
Step 9: Once the ink had dried I coated the entire car in two coats of Vallejo Model Air Clear Gloss Varnish to seal the model and cement the hard work I had done before adding the reporting marks decals to the untagged side of the car and the ends. Once the decals were dry, I coated the model in Vallejo Model Air Clear Matte Varnish and a gave the bottom of the car a light coat of grime, painted the wheels and trucks and reassembled the model. It now is reading for cement service on my layout!
© 2020, photos and text by Alexander Wright, https://www.modelrailroadtips.com